I recently was able to organize our toy room, using what I know from both Montessori principles and the Konmari method of organization. I have been nothing but thrilled with the results!!
Maria Montessori started an educational philosophy for young children, something I write about often on this blog. For organization, she used open toy shelves and kept the number of options available to children to a manageable minimum. Marie Kondo started an organizational system for adults to tidy up their house. Its tenets focus on keeping things only if they “spark joy,” giving everything a proper spot, and keeping like items near each other. I used principles from both systems, plus some of my own observations of what has worked for our family so far to design our toy room.
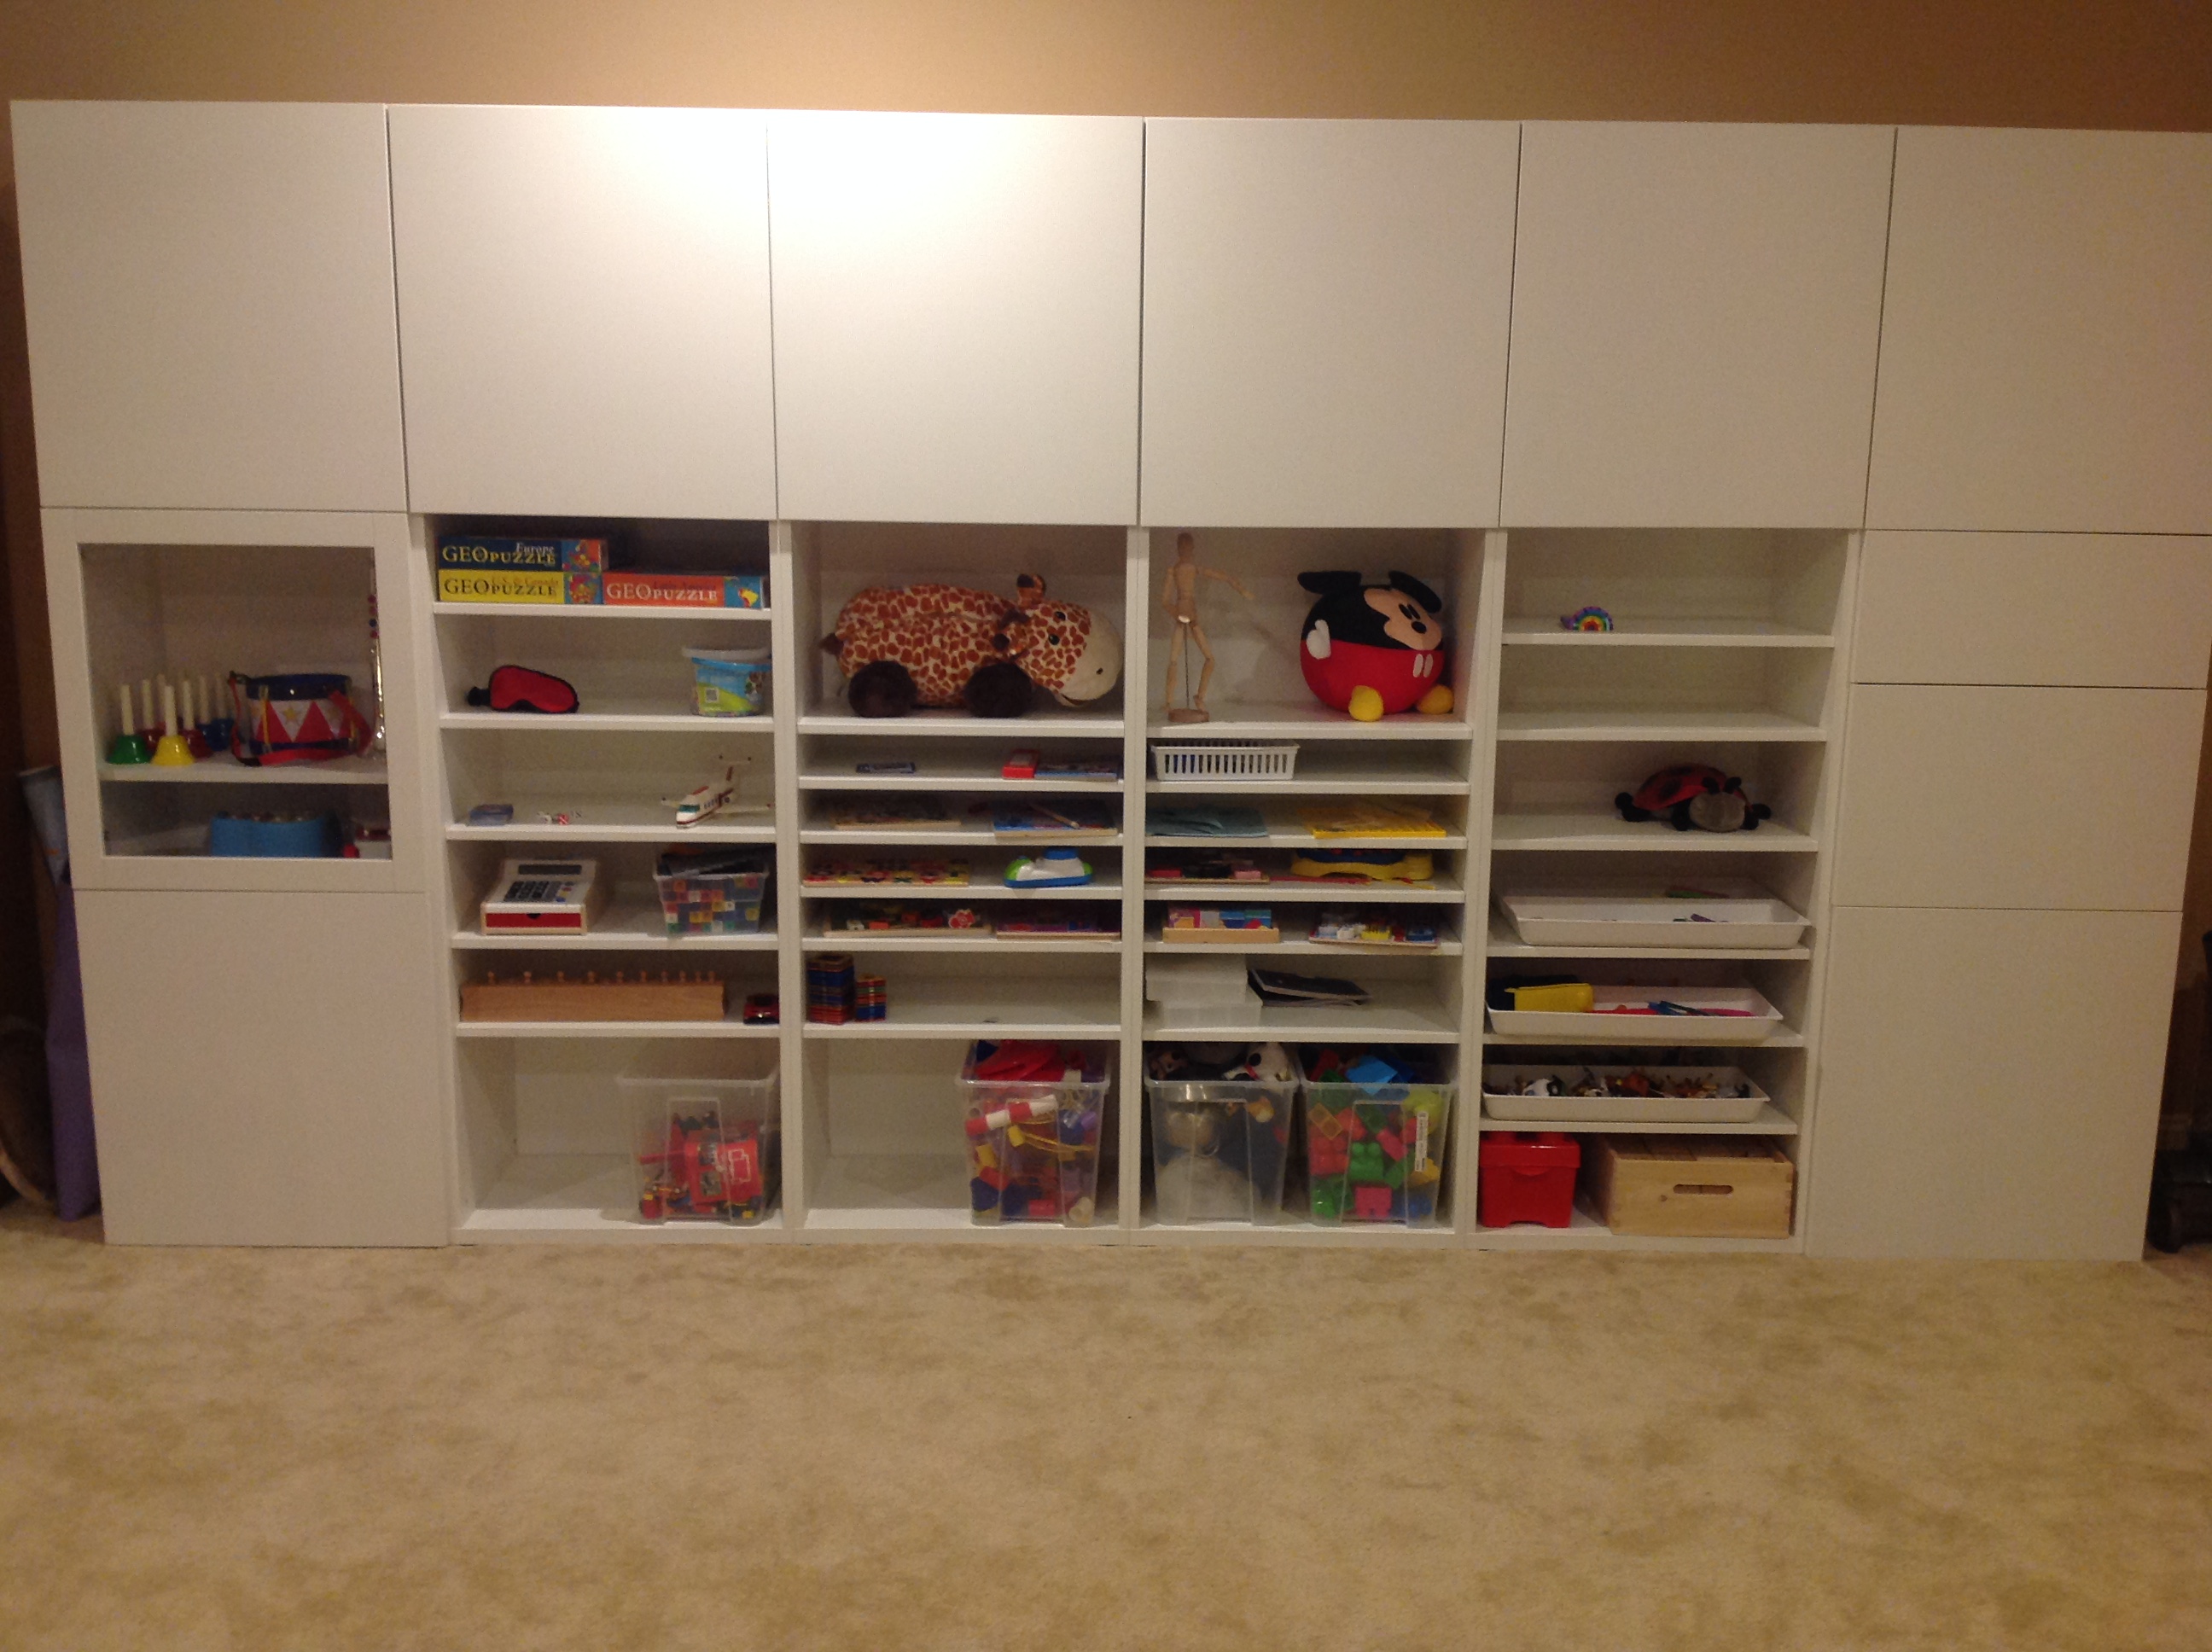
The end result of this organization focused around one large toy shelf. I believe I found a toy shelf system where the children’s intellectual development is optimized, toy rotation is a snap, everything has a spot, staying tidy is intuitive (even for children), a love of organization is instilled, and most of all: the heavy work load of cleaning was put on design … not me!
The final result!!
First, some original designs of our toy shelf and the problems we had. This was our very first toy shelf. If you go into any store that sells “toy shelves,” it will likely look something like this. It’s a bench with bins in it.
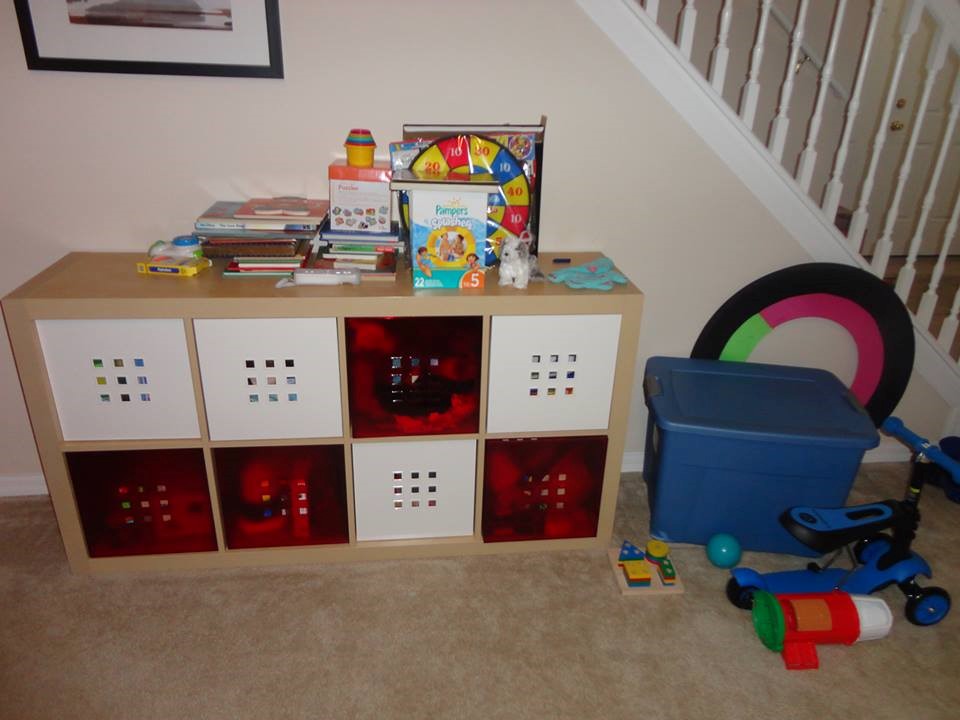
The problem with bins is that the toys just pile up on each other. There are some toys that this is ideal for, like for dress up clothes, but for many of the Montessori materials, the materials don’t pile up well. In a Montessori system, the materials are out on open shelves, at the children’s height, for the children to get the materials freely.
Note: These bins were *perfect* as a diaper changing station, if stood on its side, vertically.
We switched over to the below style of toy shelf, our second toy shelf, to the great benefit of my children’s play. With the below toy shelf, they didn’t just wait for me to find a toy in the bins, to get out for them to play with, but could play with whatever one they wanted at any time. This was a great improvement. (This is at our old house.)
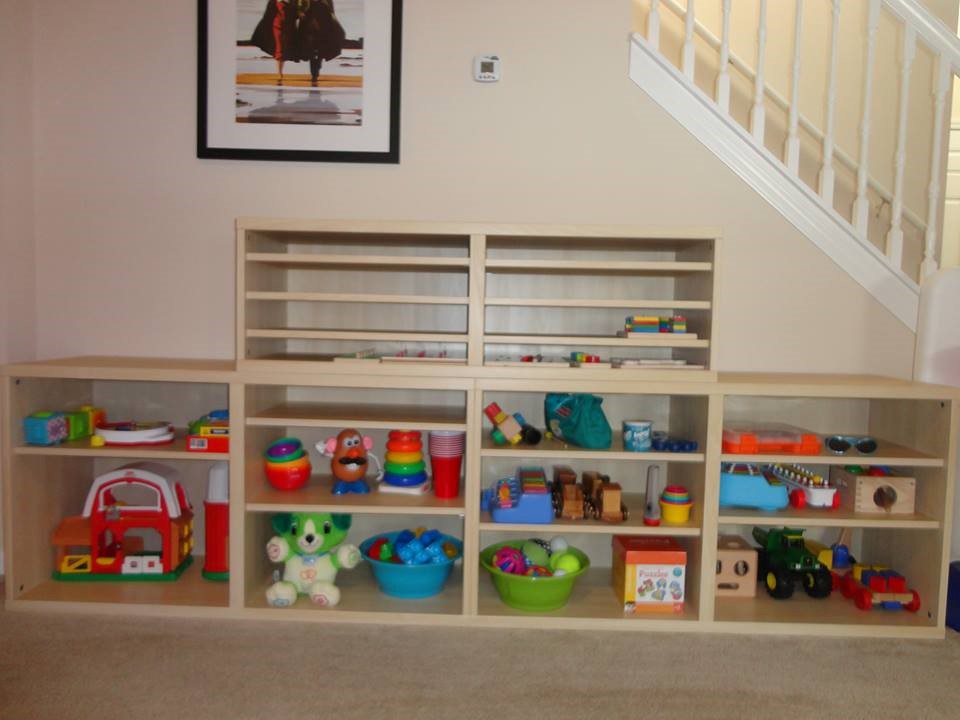
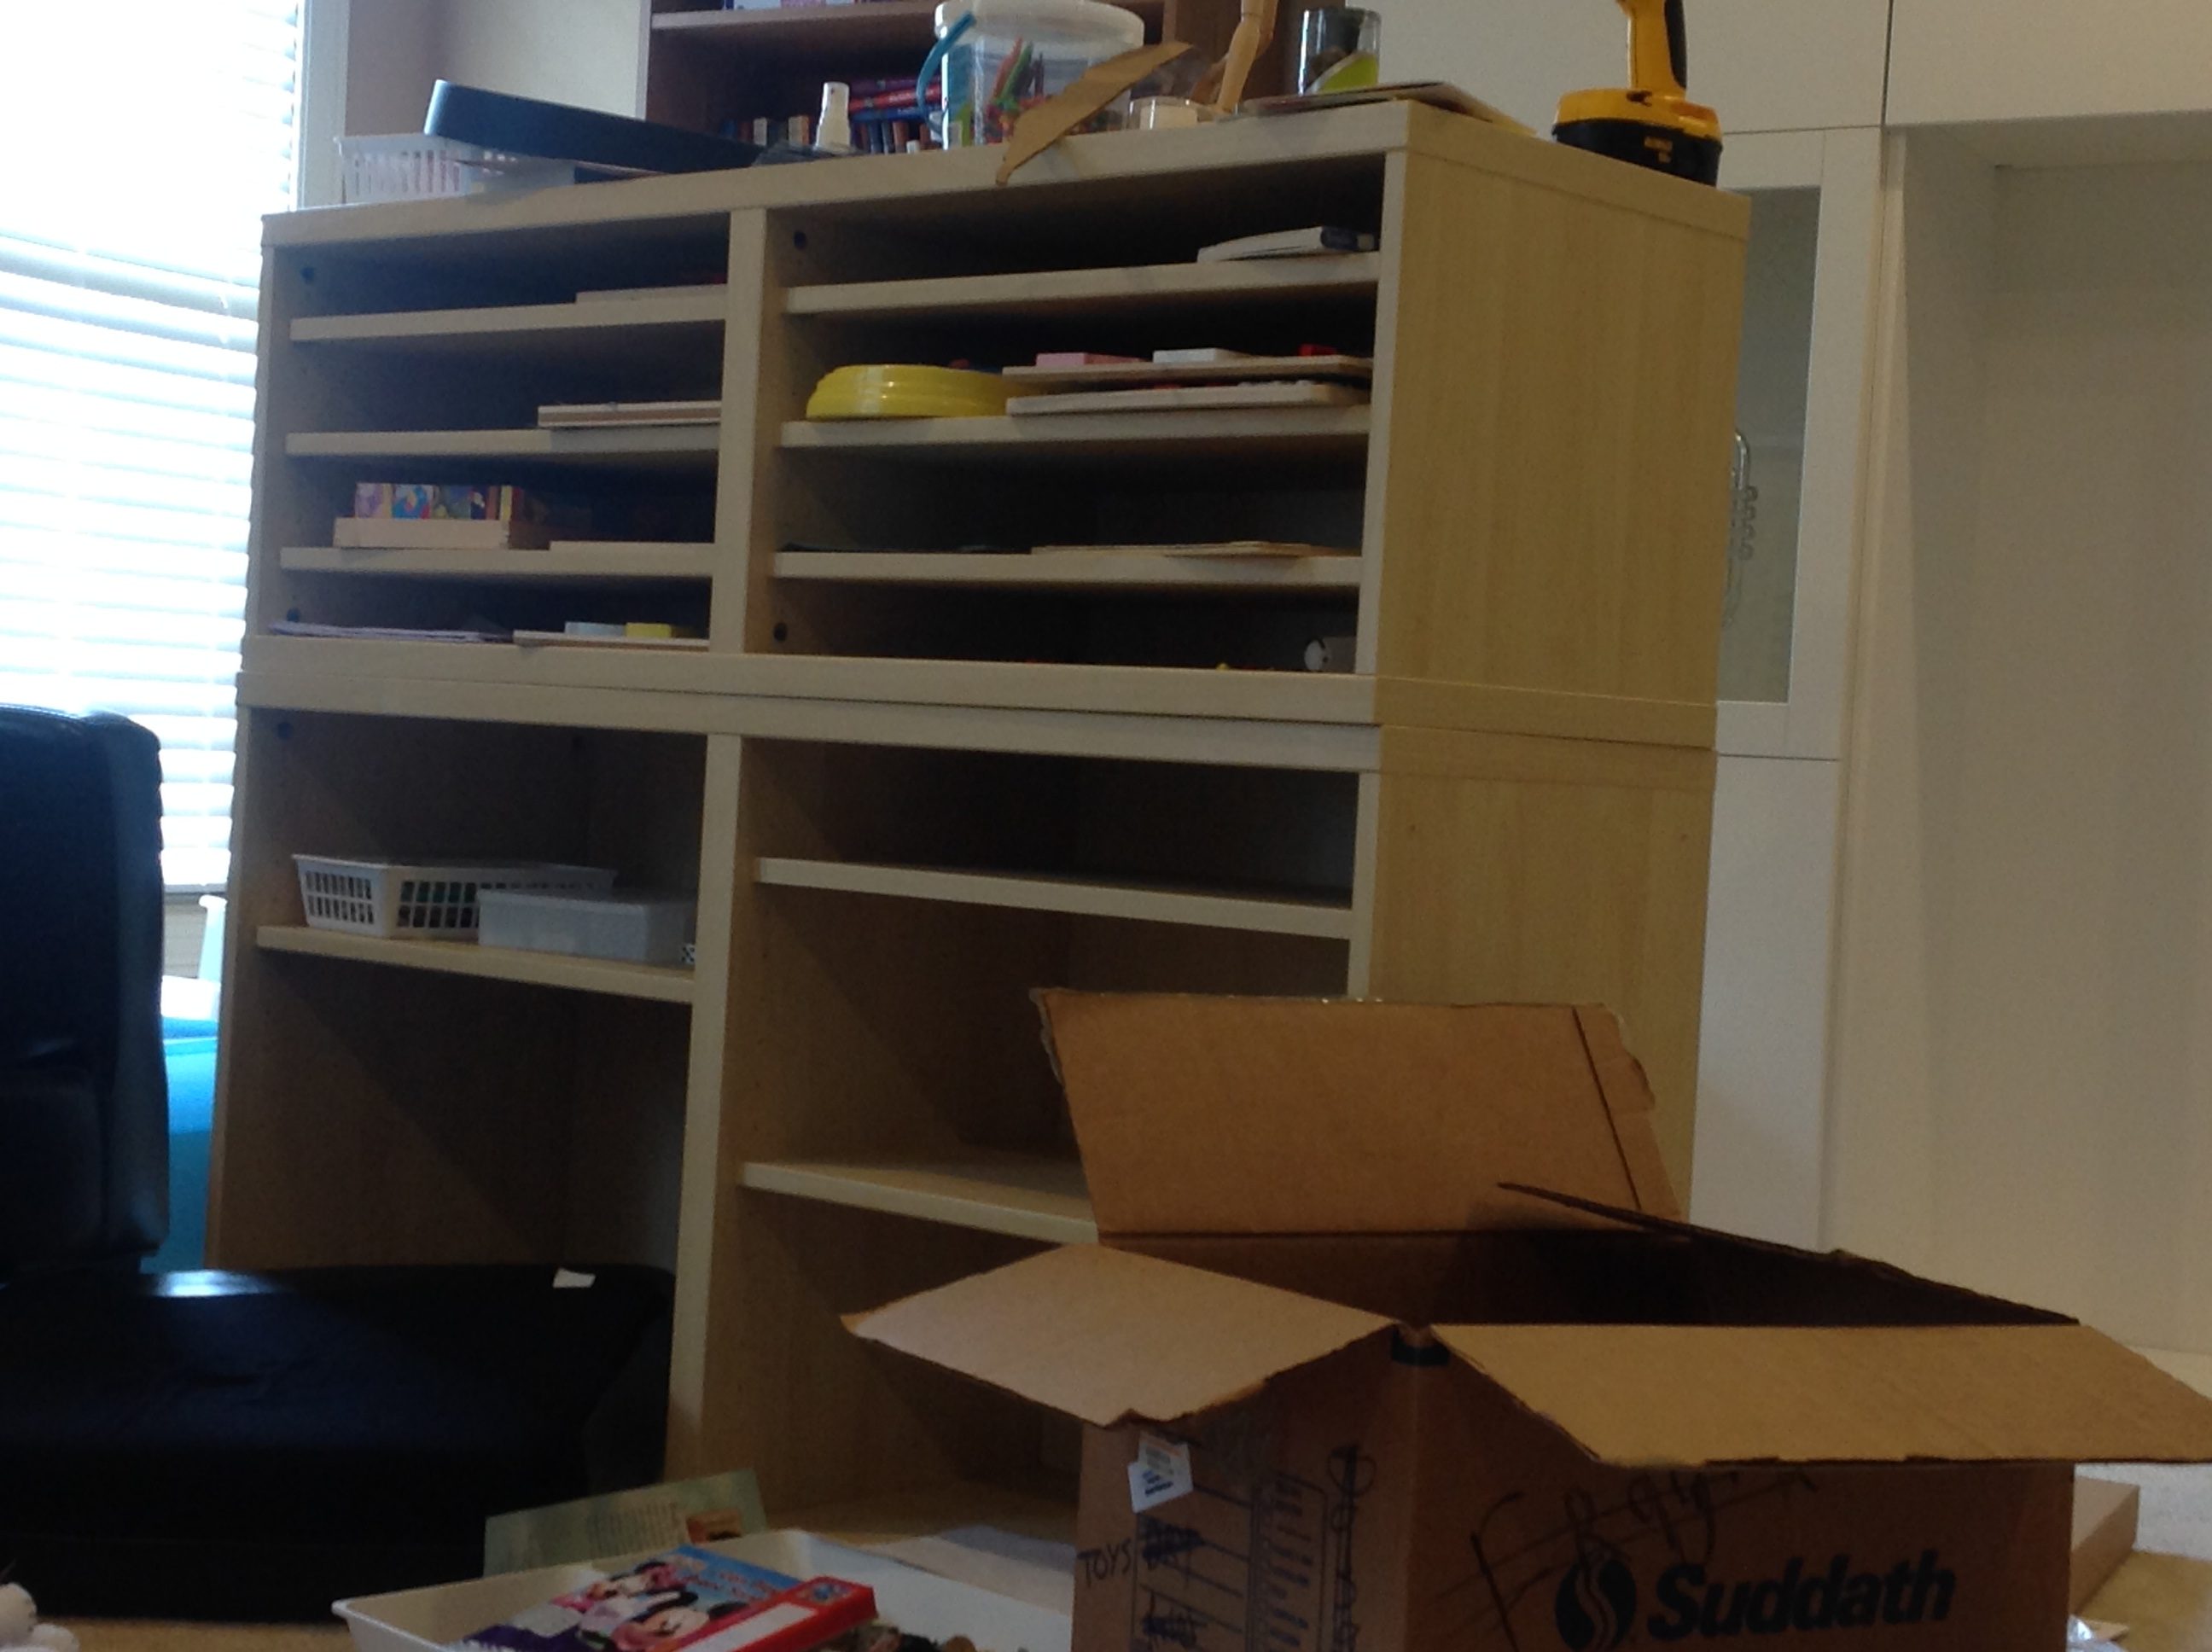
But, the way I designed this open toy shelf had a few problems. The first is that no one, not even kids, likes to put toys away on the very bottom shelf. There is about 12″-18″ of space on the bottom, about up to an adult’s knee, that most people don’t want to bend over to get or put away toys in:
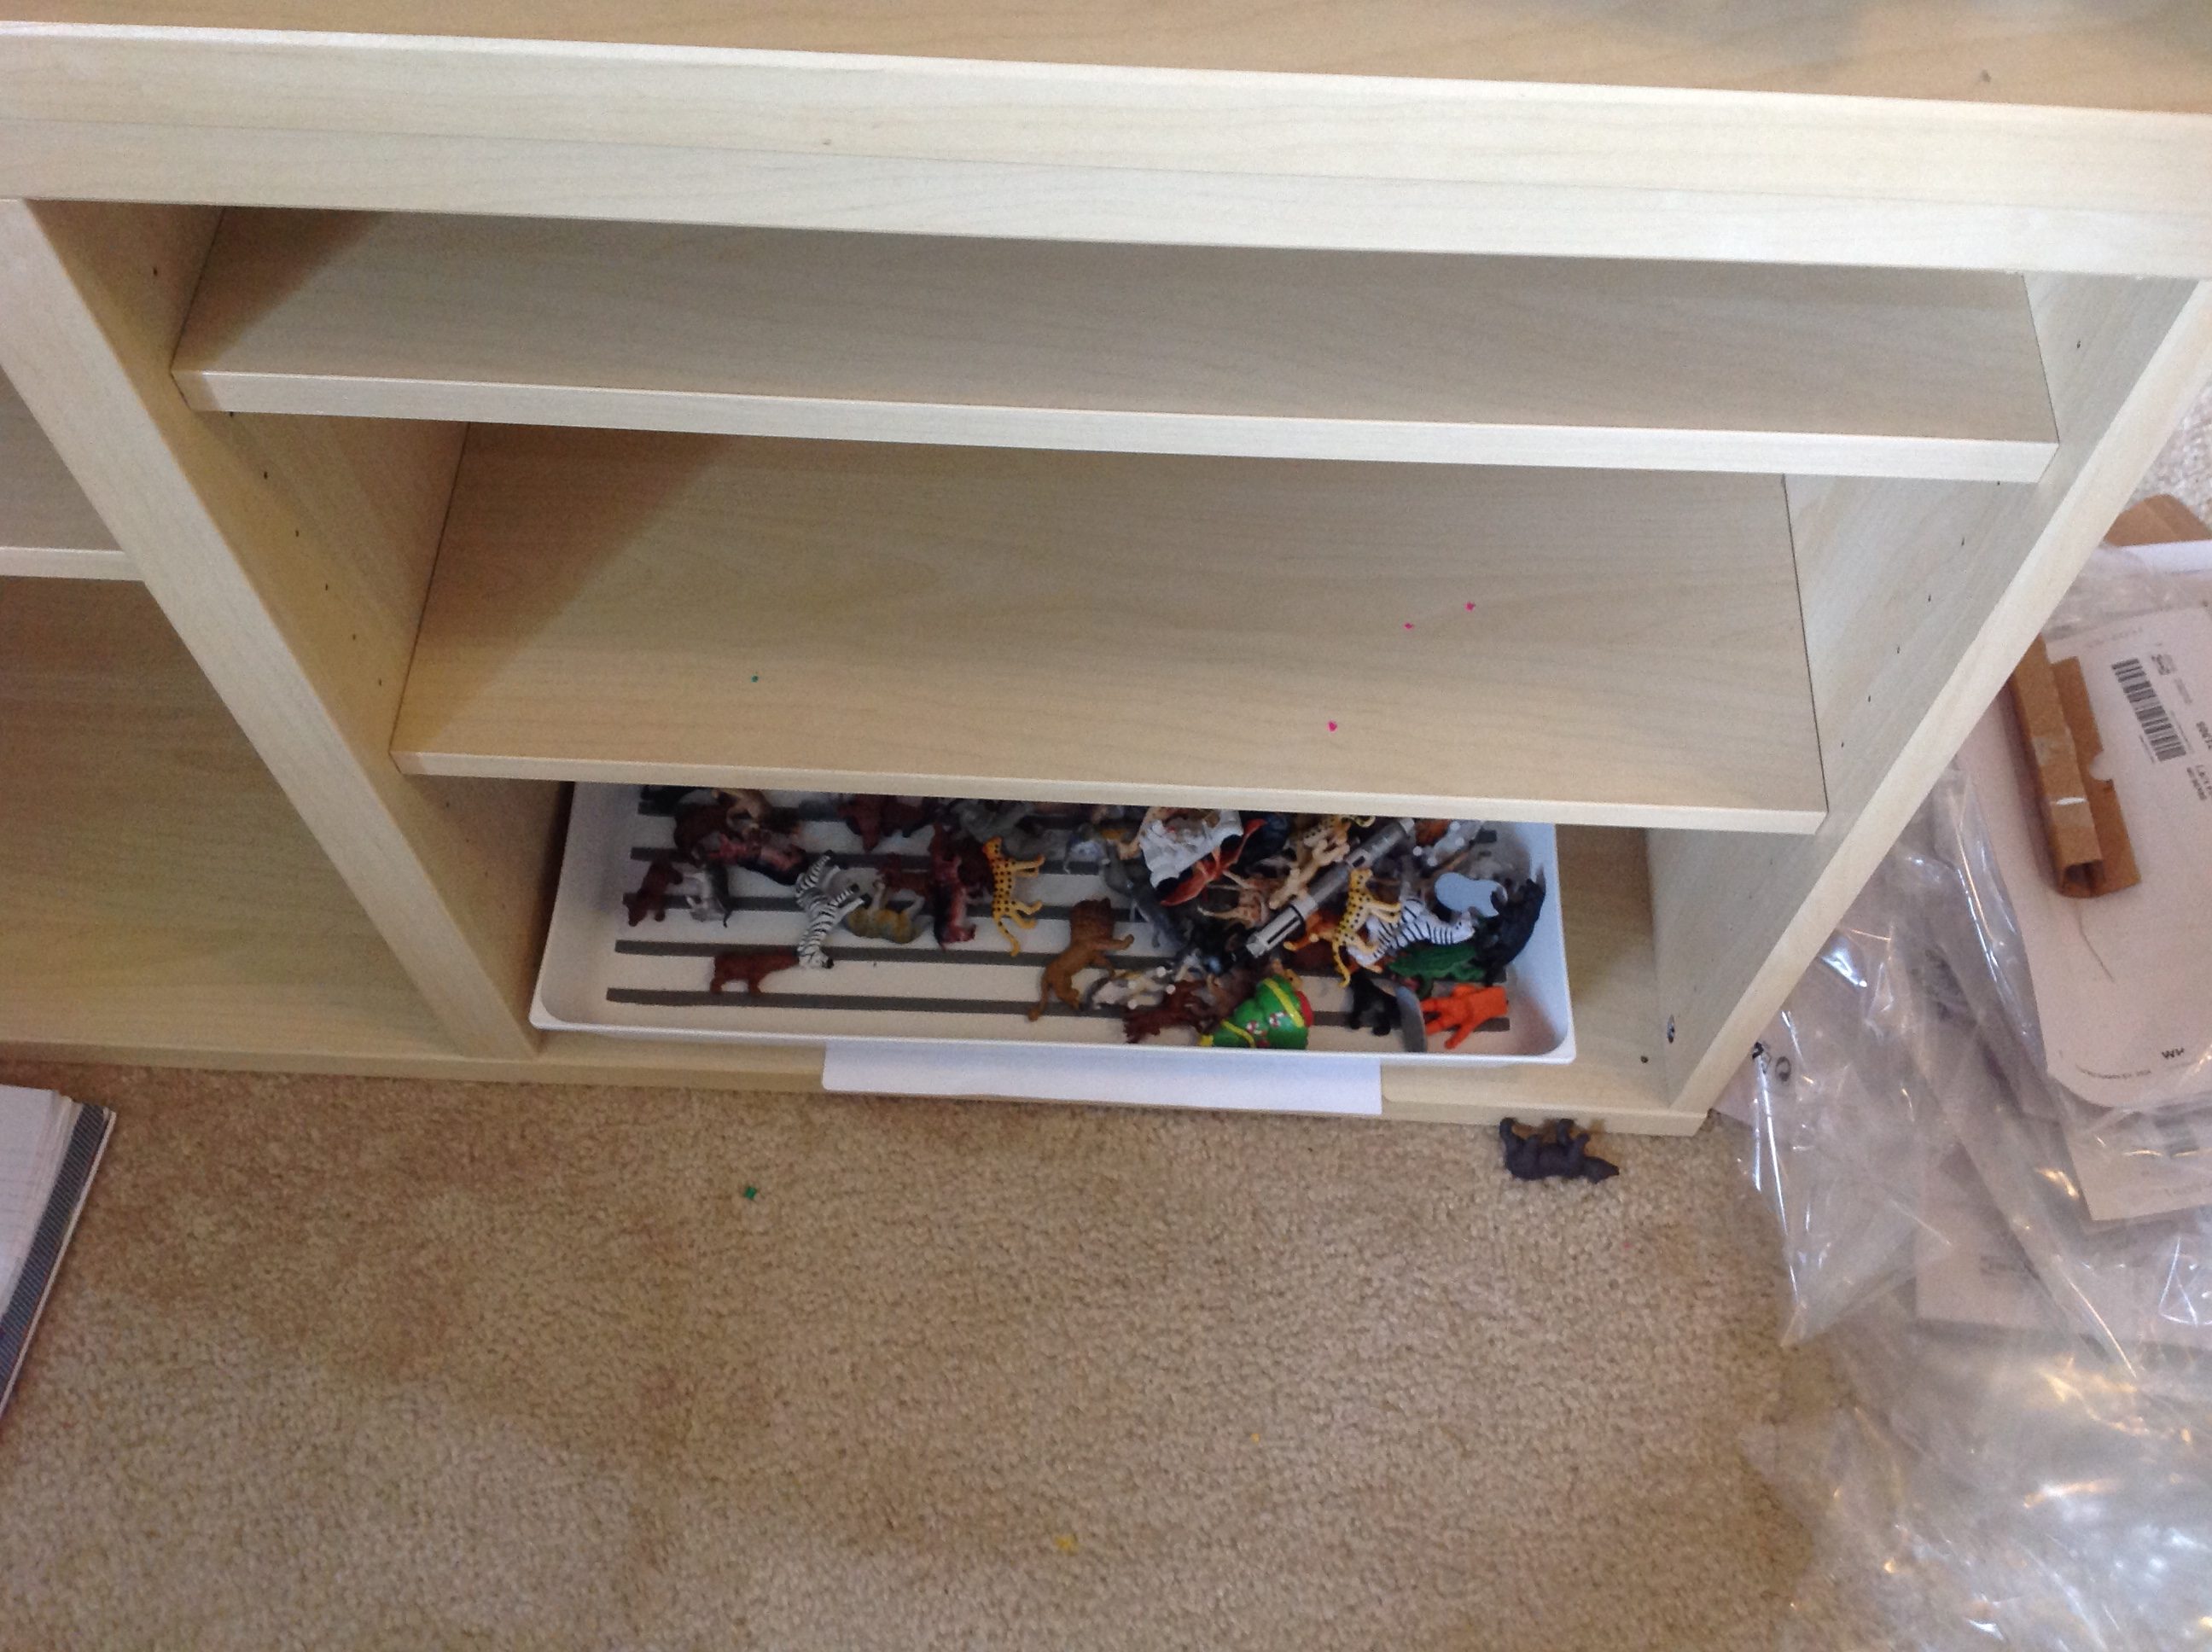
^^No one wants to reach down to get that.
The other problem is that some prime space for the kids was wasted. Prime space for kids is about 15″-30″ above the floor. I had the second row of cabinets sitting on the first row. Where the two rows met unnecessarily took up space, such that some prime space was wasted. Notice where the cabinets meet, about halfway up, in this photo:
In addition to these problems was the major problem of toy rotation. I wanted to apply Marie Kondo’s advice here, but toy rotation is naturally in conflict with her system. One of the tenets of her system, which I have found great benefit in, is to keep like items near each other. Well, with kids, it is best to keep the number of toys out to a minimum. Children also get bored with toys. Toy rotation is key. So you can’t keep like items totally near each other, because the point is to take some toys and simply remove them from the play area for some period of time. And we’re not talking a few toys. We’re talking a lot. It was actually unsettling to me to move the rotated toys out of the toy room, because I did find that it was mentally hard to keep up with where all of the toys were. For us, some were in the kids’ room closets, some in the guest bedroom, some in the garage, etc. I did want all toys, including the ones rotated out, to stay in the toy room, somehow.
So, there were some of the problems. Here was the solution.
When I started to design a toy shelf for our new toy room, I did a lot of research on what kind of book cases might work. My research kept coming back to using the Besta system of cabinets from Ikea. They are completely configurable and pretty affordable. Plus, the end result, I have found, always looks pretty sharp. I found the Besta planner, a design tool offered on the Ikea website, really helped me design the shelves. The tool really helped with the dimensions for the cabinets and shelves. It forced me to really think about where things go. The design tool did not, however, show the color very well. But, as far as color, for a toy room, I favor lighter colors. I went with white, and I loved it.
Using the design tool, I realized I wasn’t limited to stacking rows of cabinets on top of rows of cabinets. Rather, I could get tall cabinets (a column) and put the shelves wherever I wanted. I used 72″ cabinets (6 feet). This eliminated the problem of wasting prime space in the shelf, where the cabinets previously stacked. I estimate from 15″ – 30″ (maybe as high as 35″, depending on the age of the child) above the floor is a prime spot for young children to retrieve and use toys on the toy shelf. I reserved this area for puzzles and other materials:

Since the bottom 15″ are so annoying to get to, they serve pretty perfectly for holding bins of things. We have things that bins are ideal for, including Mega Bloks, wooden train tracks, Legoes, and dress up bins. I mostly set it up so a row of bins goes at the bottom.
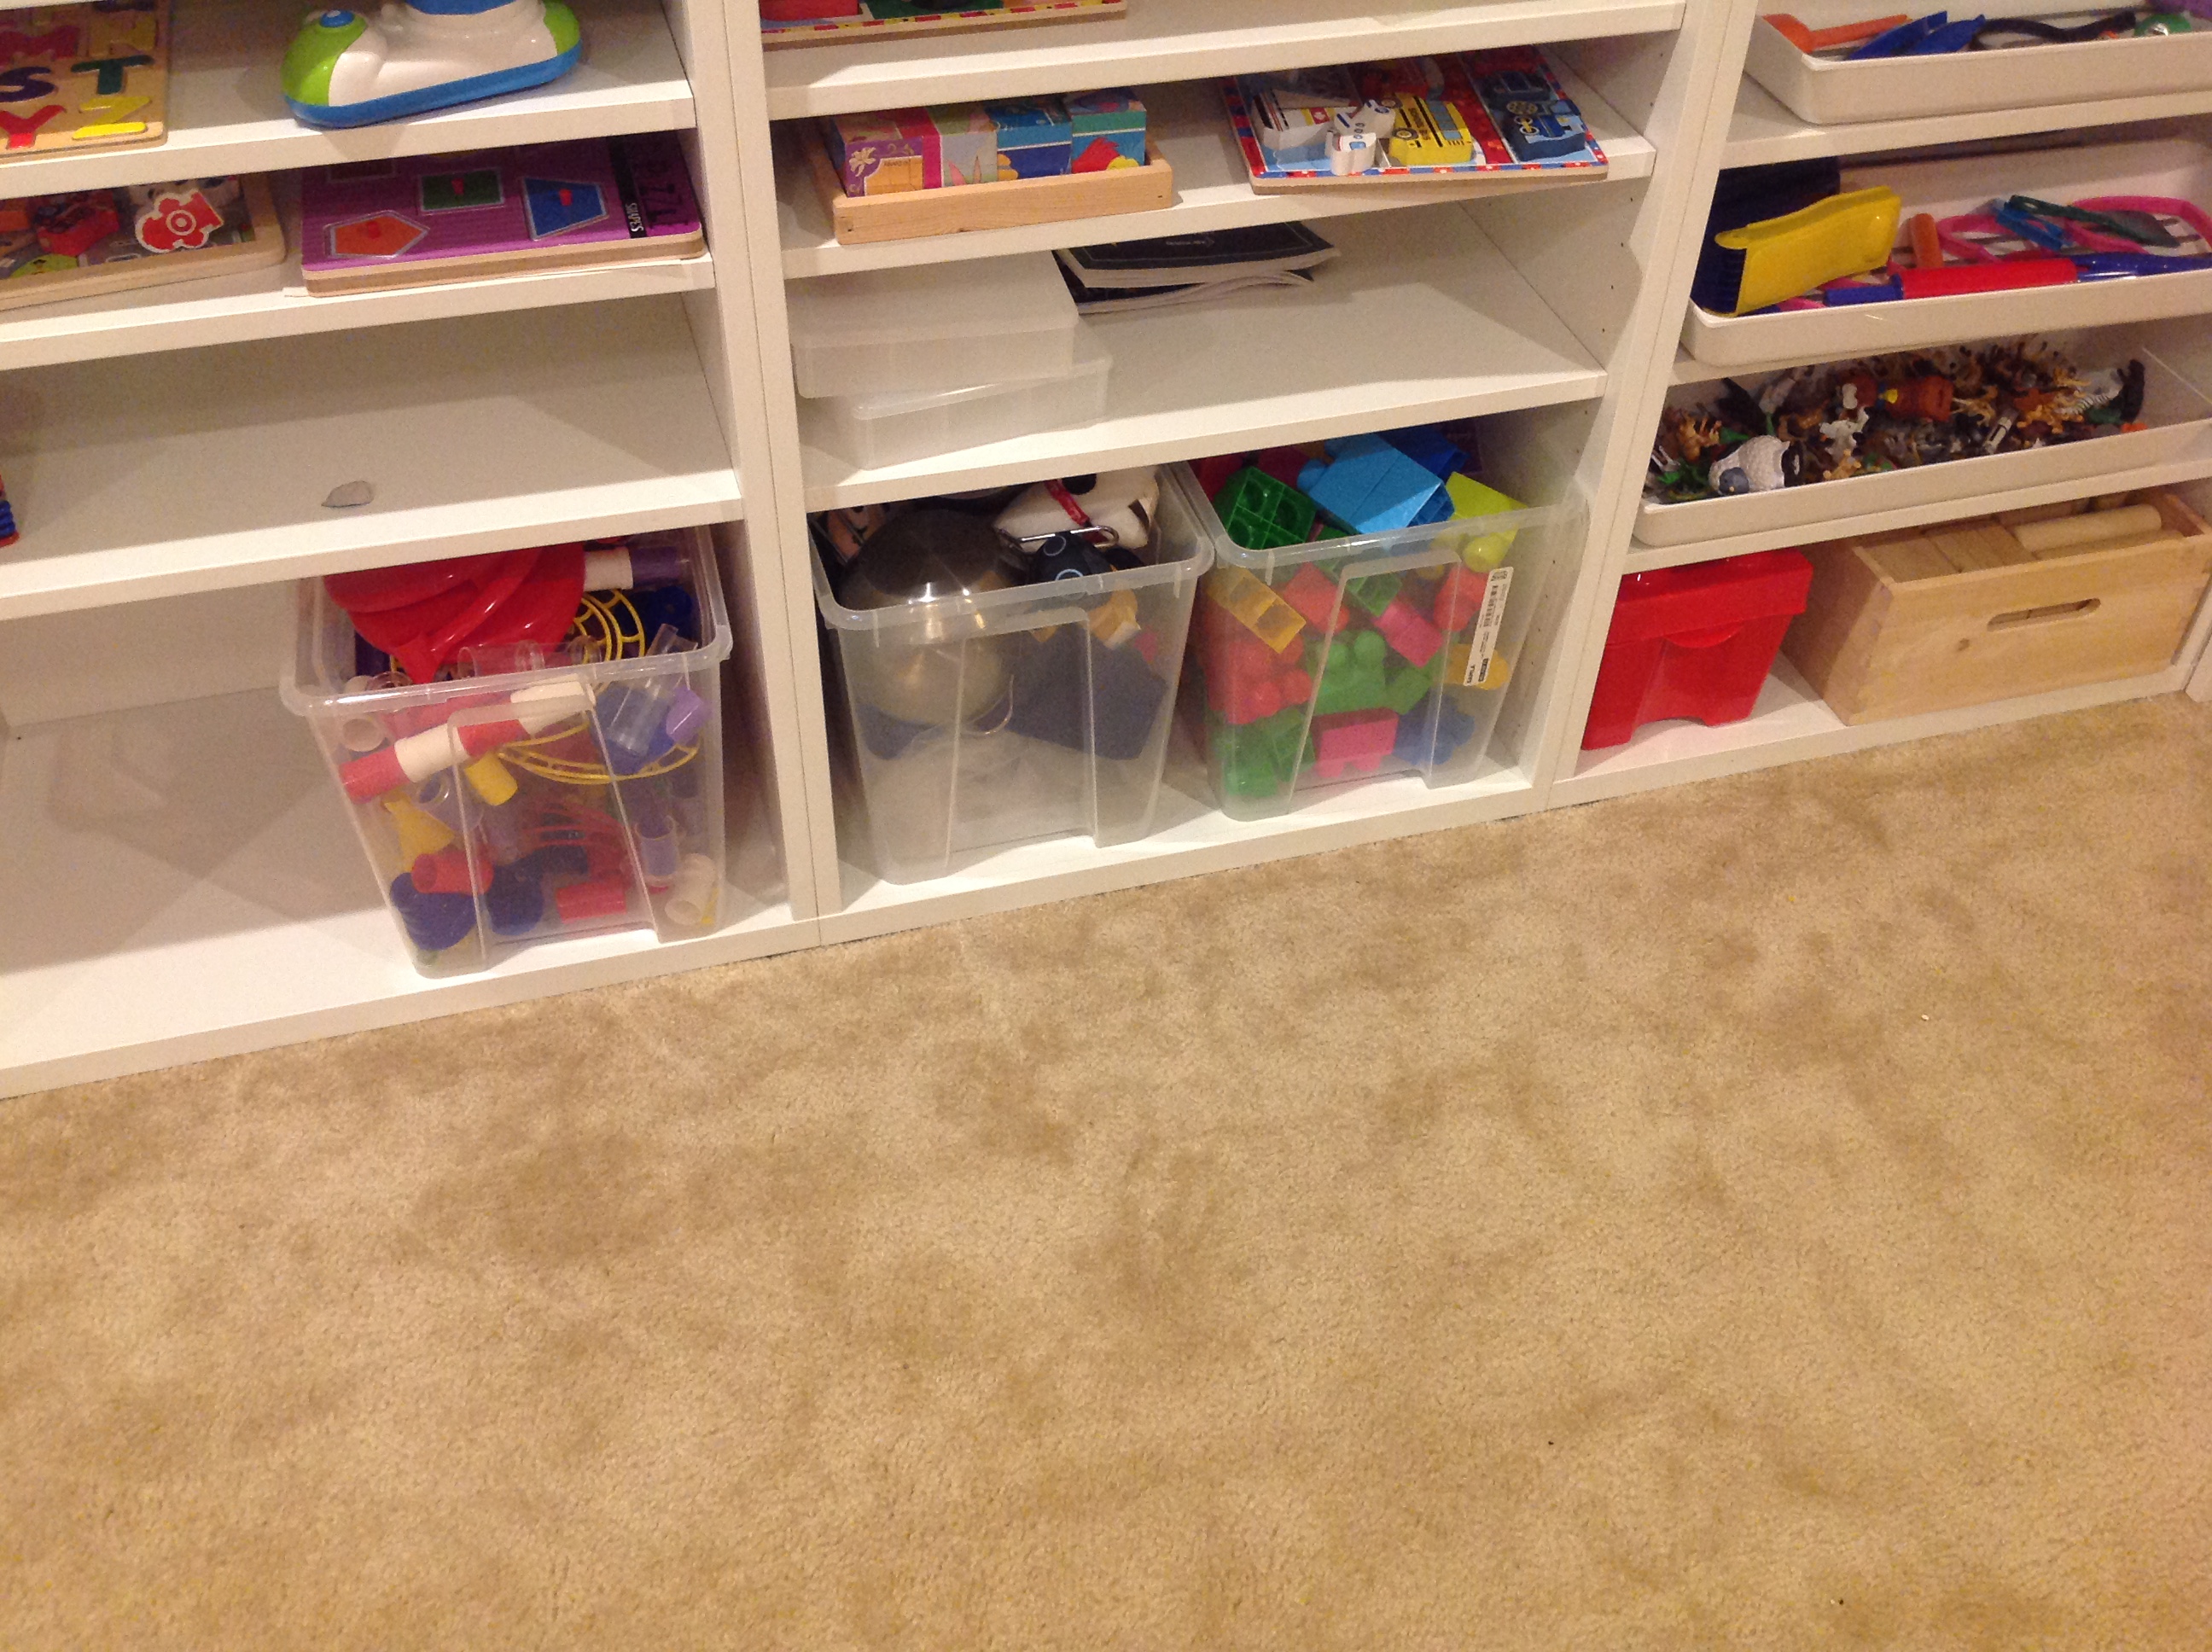
I knew this design was a winner when, the day after this shelf was up and loaded, my toddler daughter easily grabbed the Mega Bloks out of the bottom row and happily built towers out of them. She also easily understood how to put them away, and where they went when done.
I did put one shelf lower for the very bottom row, as shown above on the right. This was to hold heavy wood blocks, which cannot be anywhere but the bottom shelf for safety reasons. I am actually finding I have many wooden toys that probably could have used the same treatment, but I didn’t totally plan for them. Oh well.
One thing that worked well in a previous book case was to have a drawing station behind a closed door. This way, infants and toddlers can’t get to it, but preschoolers can. (This is how a home setting is different than a school setting: School can segregate the children somewhat by age.) I never plan on rotating this drawing station any differently, i.e., drawing materials will always be out. So, I am fine with it being on the bottom row. My son finds drawing materials irresistible, so he has no problem remembering that they are here, even behind the closed door, and using them, daily.
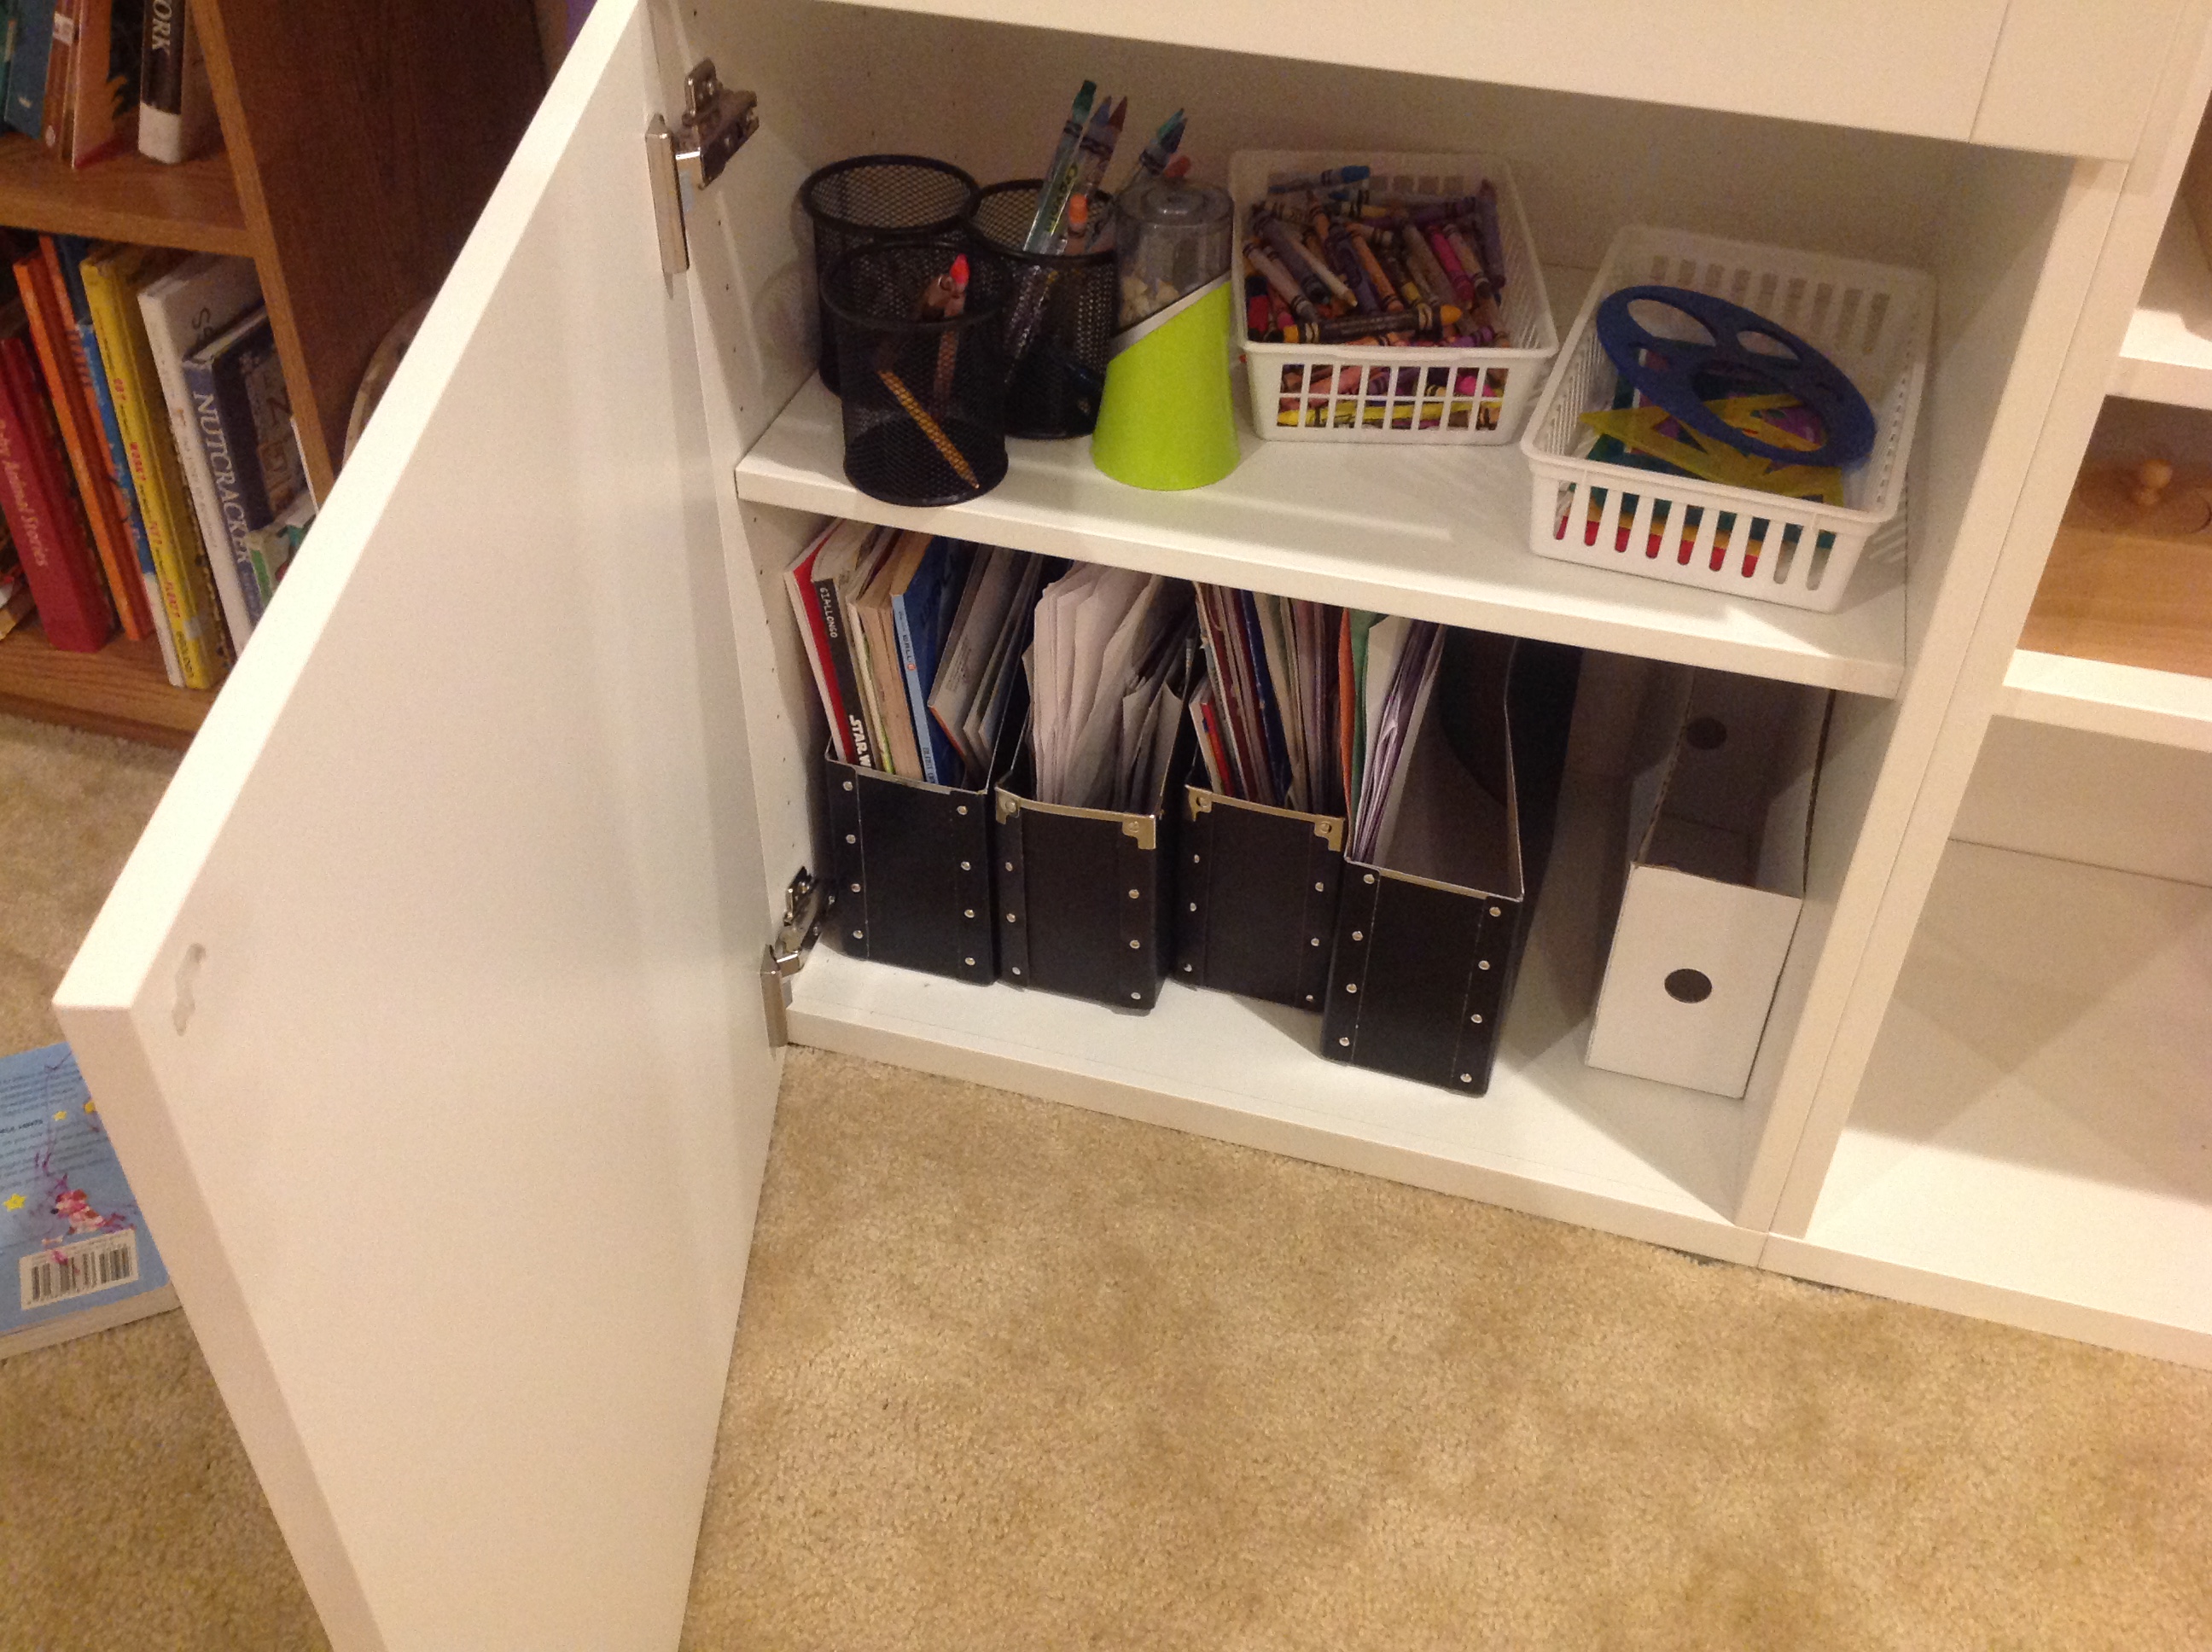
True to Konmari, I put paper in vertical holders, as shown above. Workbooks and map activities are also in vertical holders here. Pens and pencils are in circular bins. Crayons are in their own rectangular bin and stencils are in another.
Observant Mom Story: Once, my son found a map that belonged to a Thomas the Train book. Well, that map technically belongs with the book. But my son knew that maps go in one of the vertical paper holders above, and put it in there! I was amazed at how intuitive it was for him to know where things “go.” This is the power of Konmari!
This drawing station is what is in the cabinet behind the bottom left door of our toy shelf. We have similar doors on the right. I haven’t yet figured out what to put there, but I really like the idea of putting things behind low, closed doors that are irresistible to children, such that they are always willing to open the door to get them, but yet you don’t necessarily want them getting to as often, or other kids getting to ever. Since the doors are low, I also prefer things that don’t need to be moved often or rotated out. I probably will put arts and crafts, such as perl and pony beads, and board games behind these doors. My preschooler loves these activities, and, I admit, I wish he didn’t get them so often, because they do cause clutter with many little pieces. So putting them out where they are accessible but not entirely visible is ideal.
Based on a book case we used to use, I liked how our musical instruments used to be behind glass doors. I carried that on to this shelf, and pointed out to my son (4) that we can put beautiful things that we want on display behind glass doors. I love this dignified spot for precious items like this–again where his toddler sister cannot have them at free will.
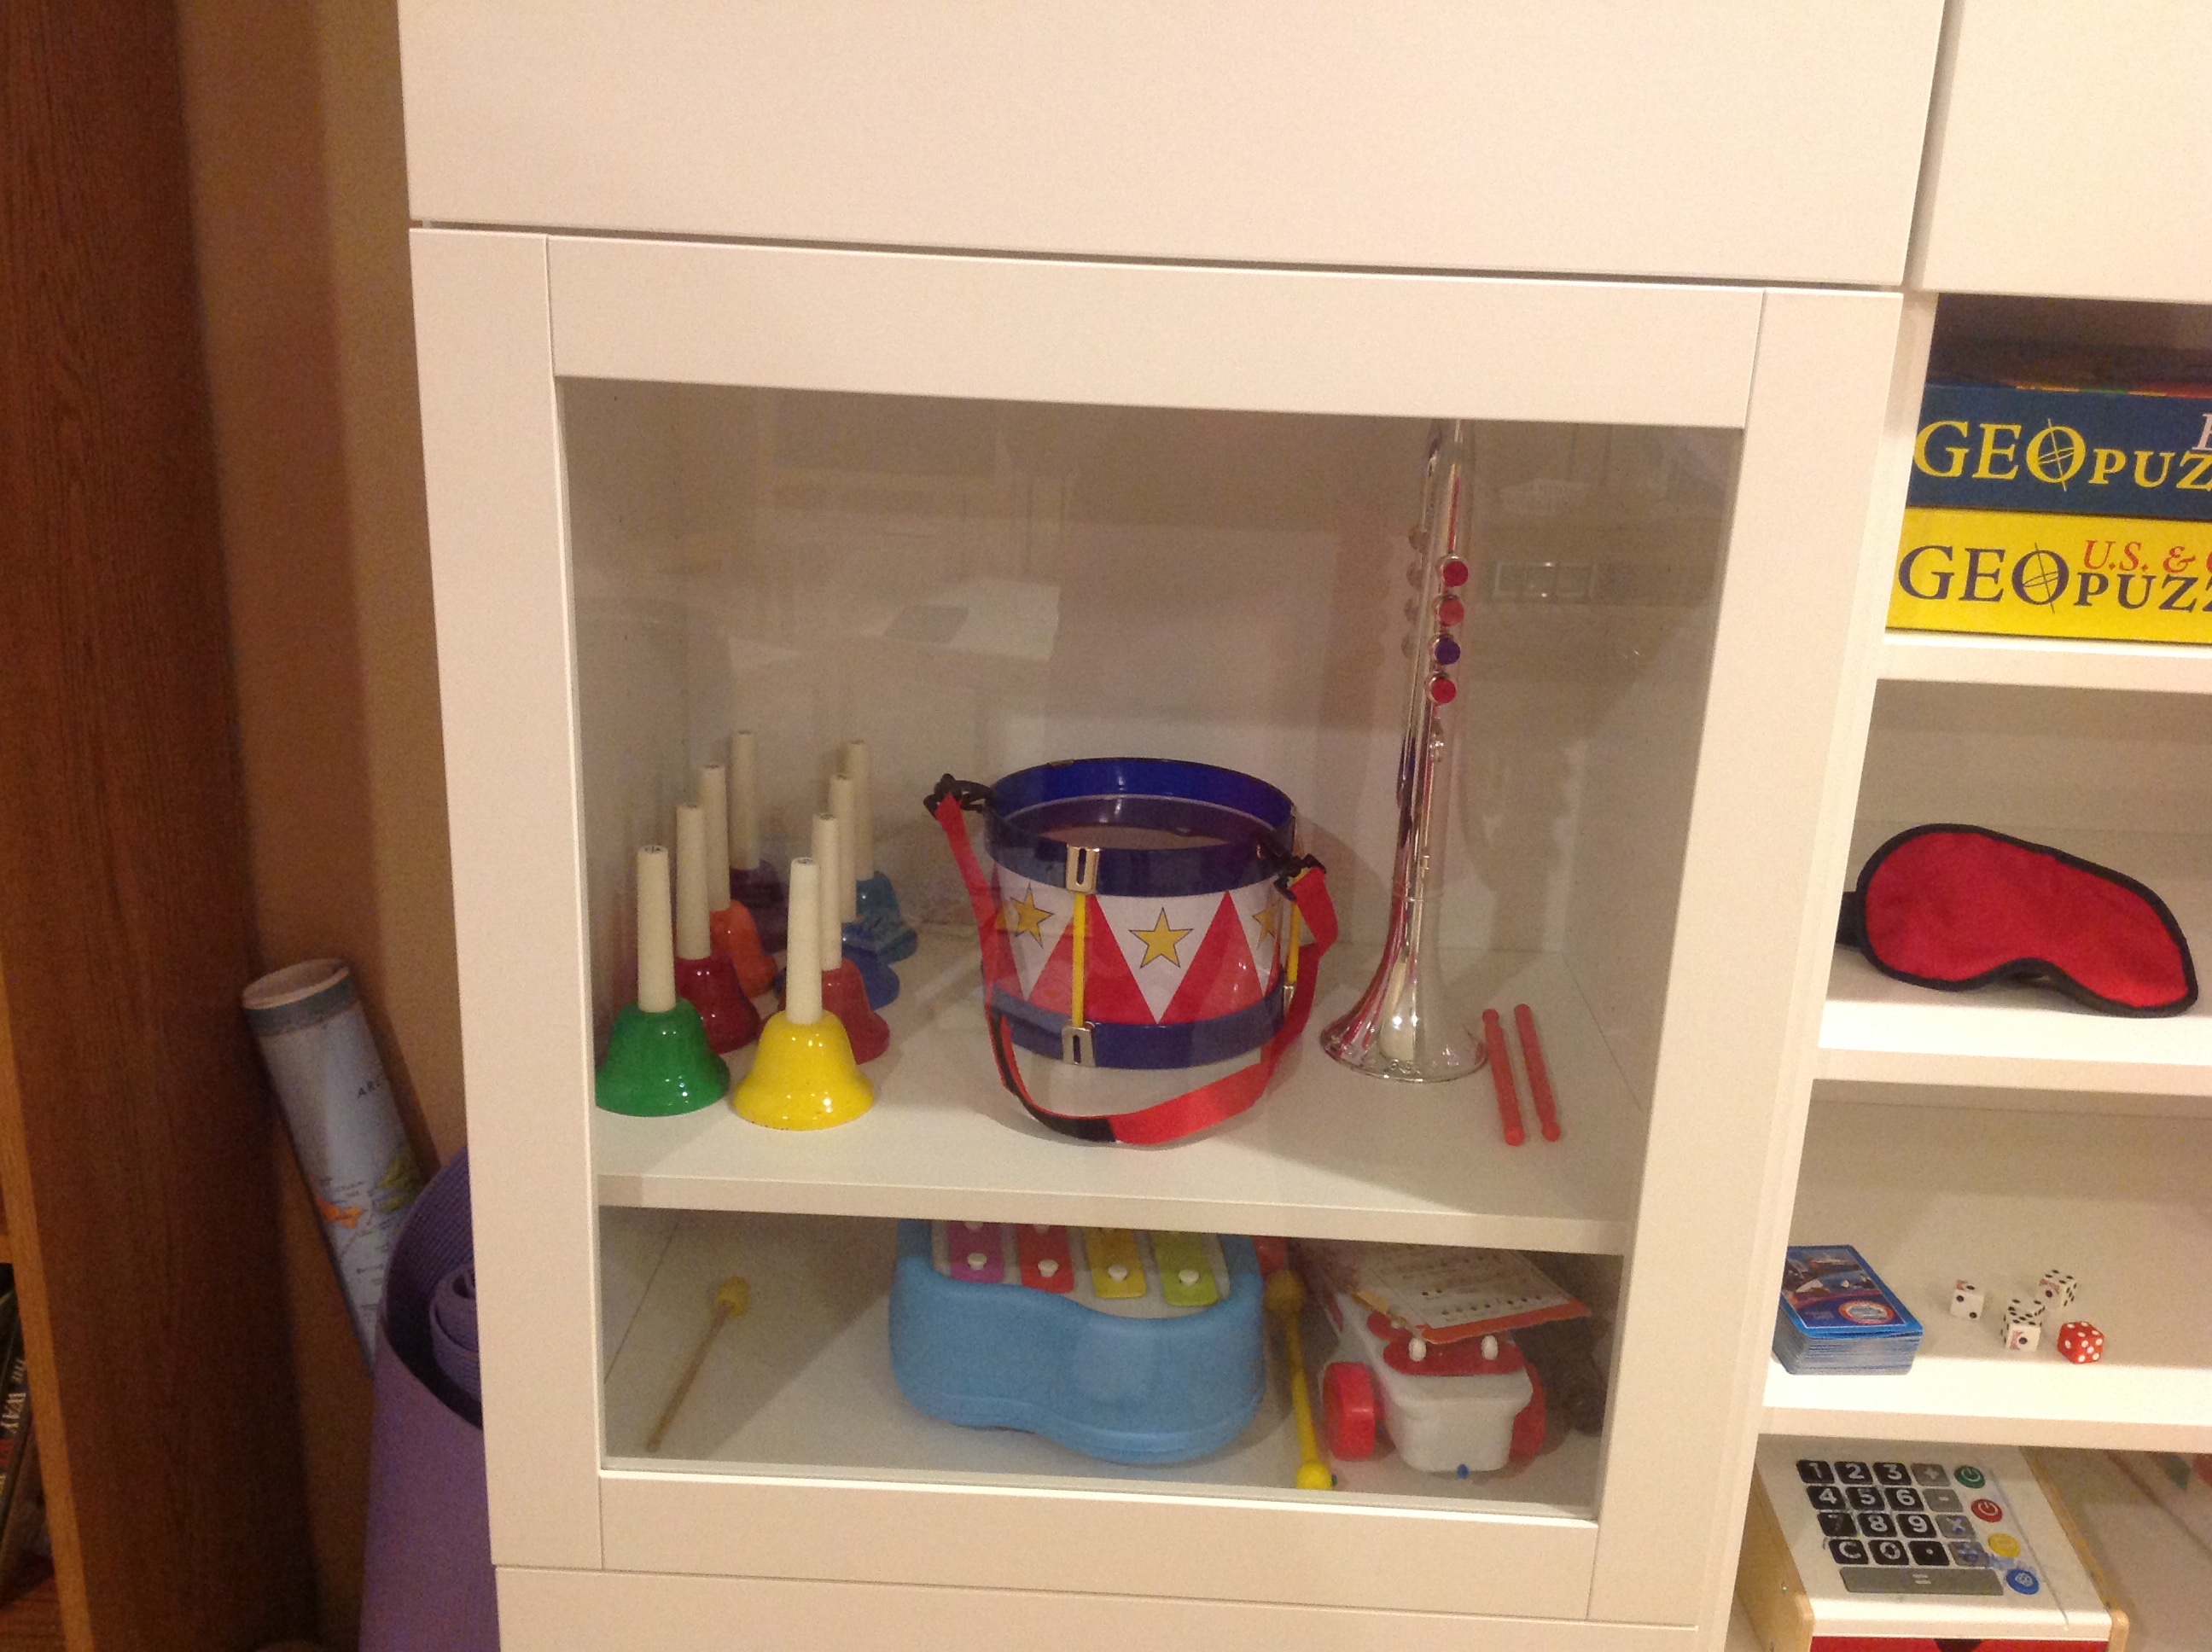
That constitutes most of where the children can get. Their toys are naturally funneled into a smaller area, where toys are proudly out on display, in logical places, in very respectful ways.
Then from somewhere around 30/35″ – 45″ I designated as “mom space.” This is too high for the kids (although my 4 year old, I find, can get to it), but it is a pretty decent height, almost at eye level, to put something attractive in. I found it important to designate a little bit of space just to be attractive. This was after all inspired by Marie Kondo. She is the declutter queen and asks her customers to think of their vision of how they want things to be. This toy shelf shouldn’t just be a place to put stuff. It should inspire!
Right now I have but Mickey Mouse and a stuffed Giraffe in mom space, but I’ll get creative as time goes on:
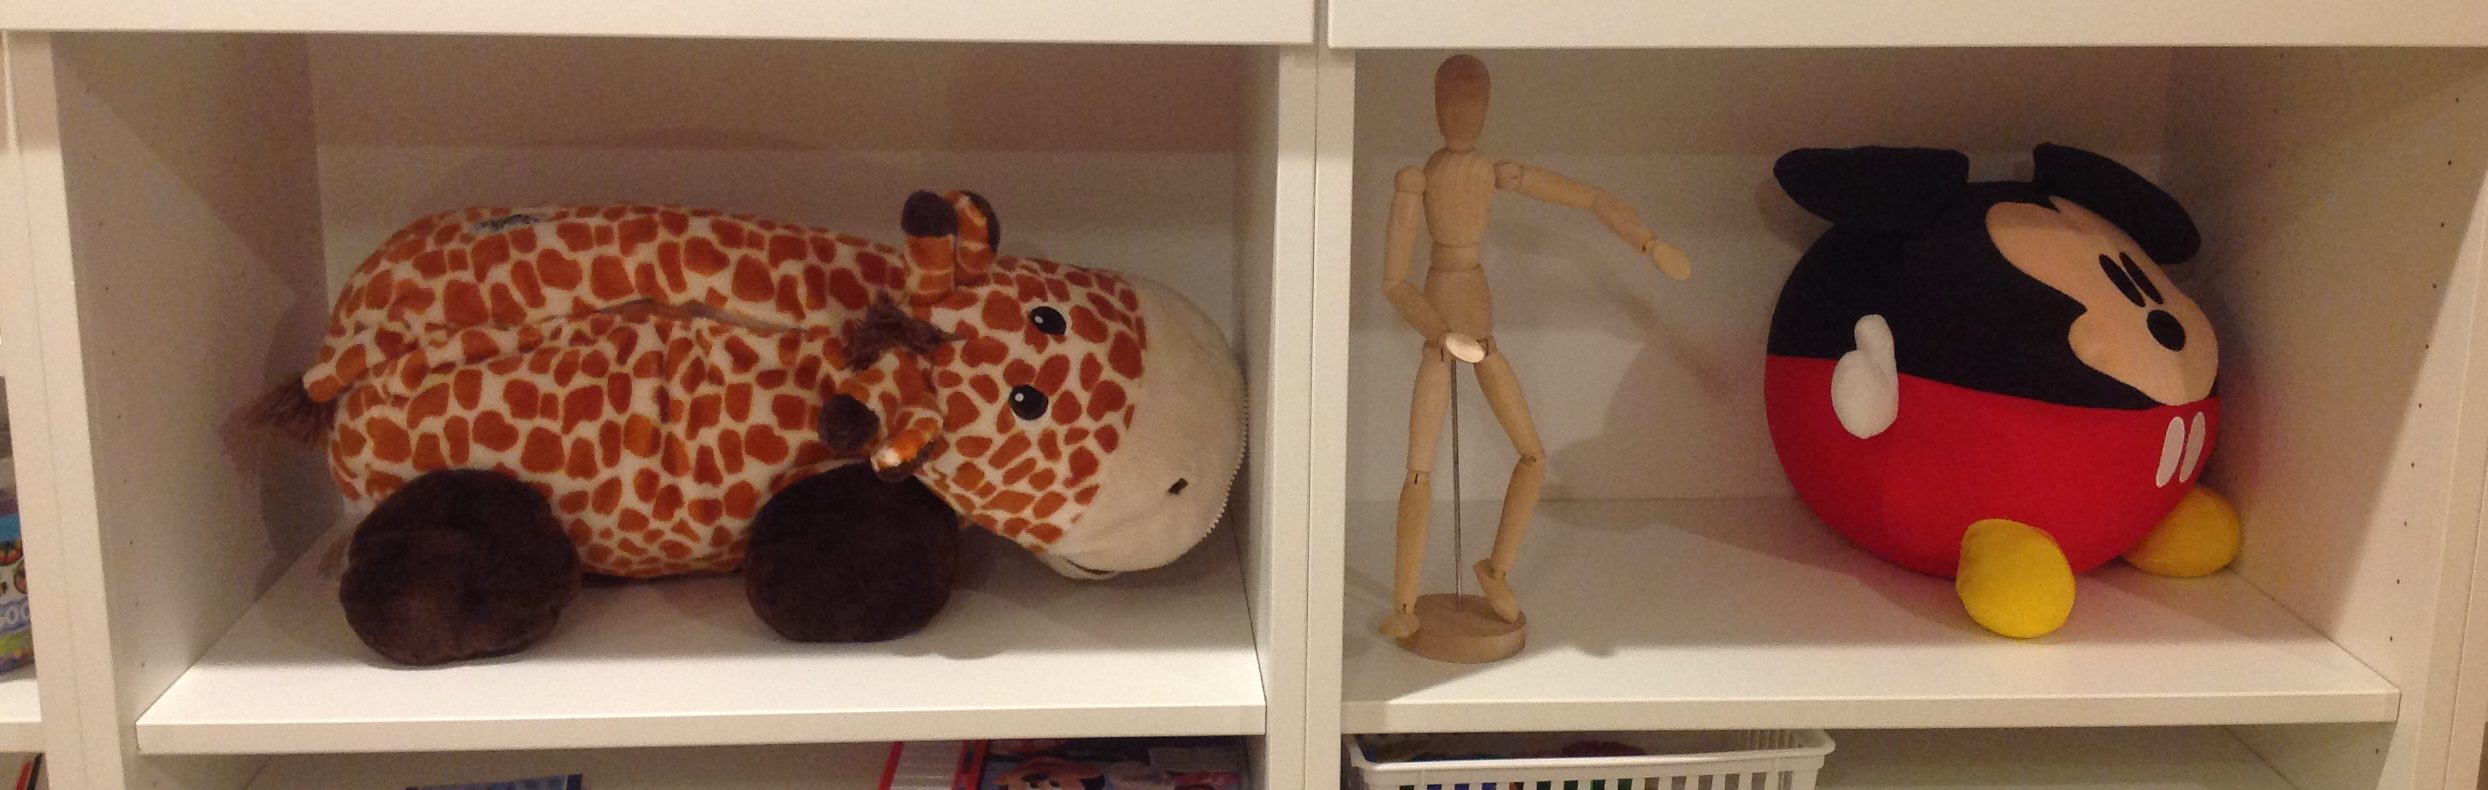
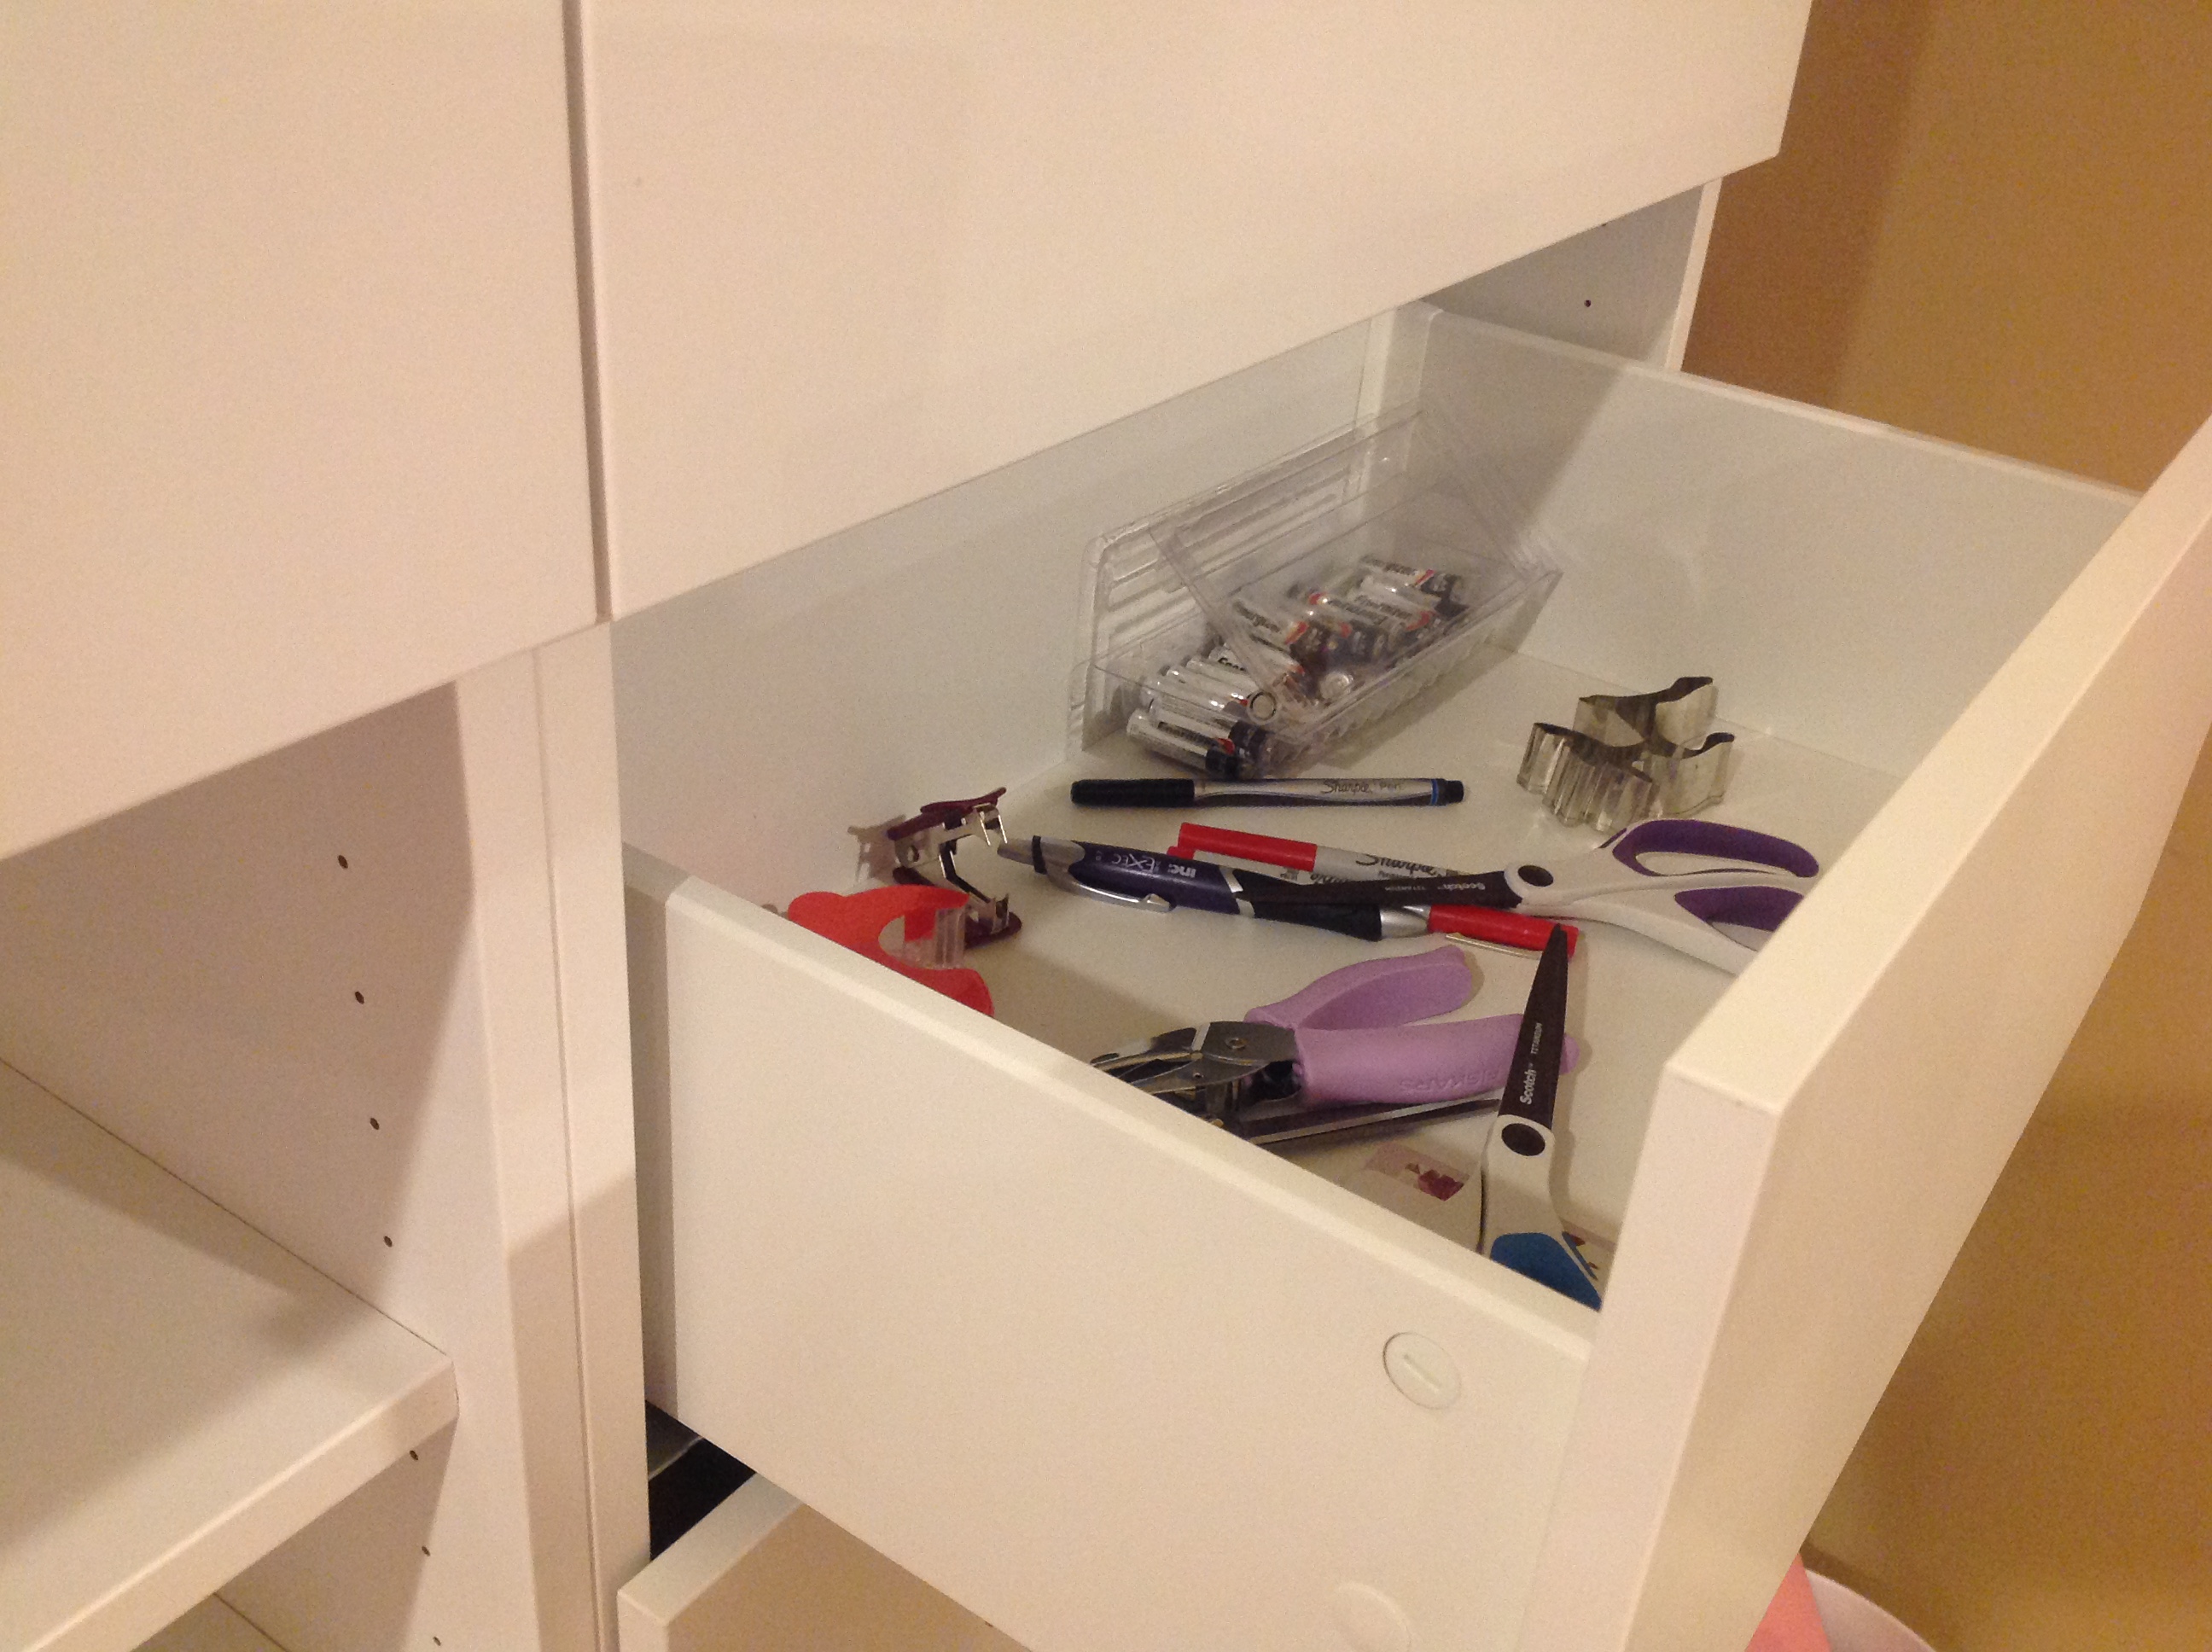
Also in this mom space, I put one drawer. It is high enough to be out of kids’ reach, but low enough that I can see into it from above. I am glad I built this drawer into here. I can put scissors and such that pile easily, and that I don’t want the kids to get.
And, now, for toy rotation. Yes, from the original picture, you may see that I put an entire row at the top that is meant to be behind closed doors. It is entirely meant for storage. This is a peak behind one of the doors:
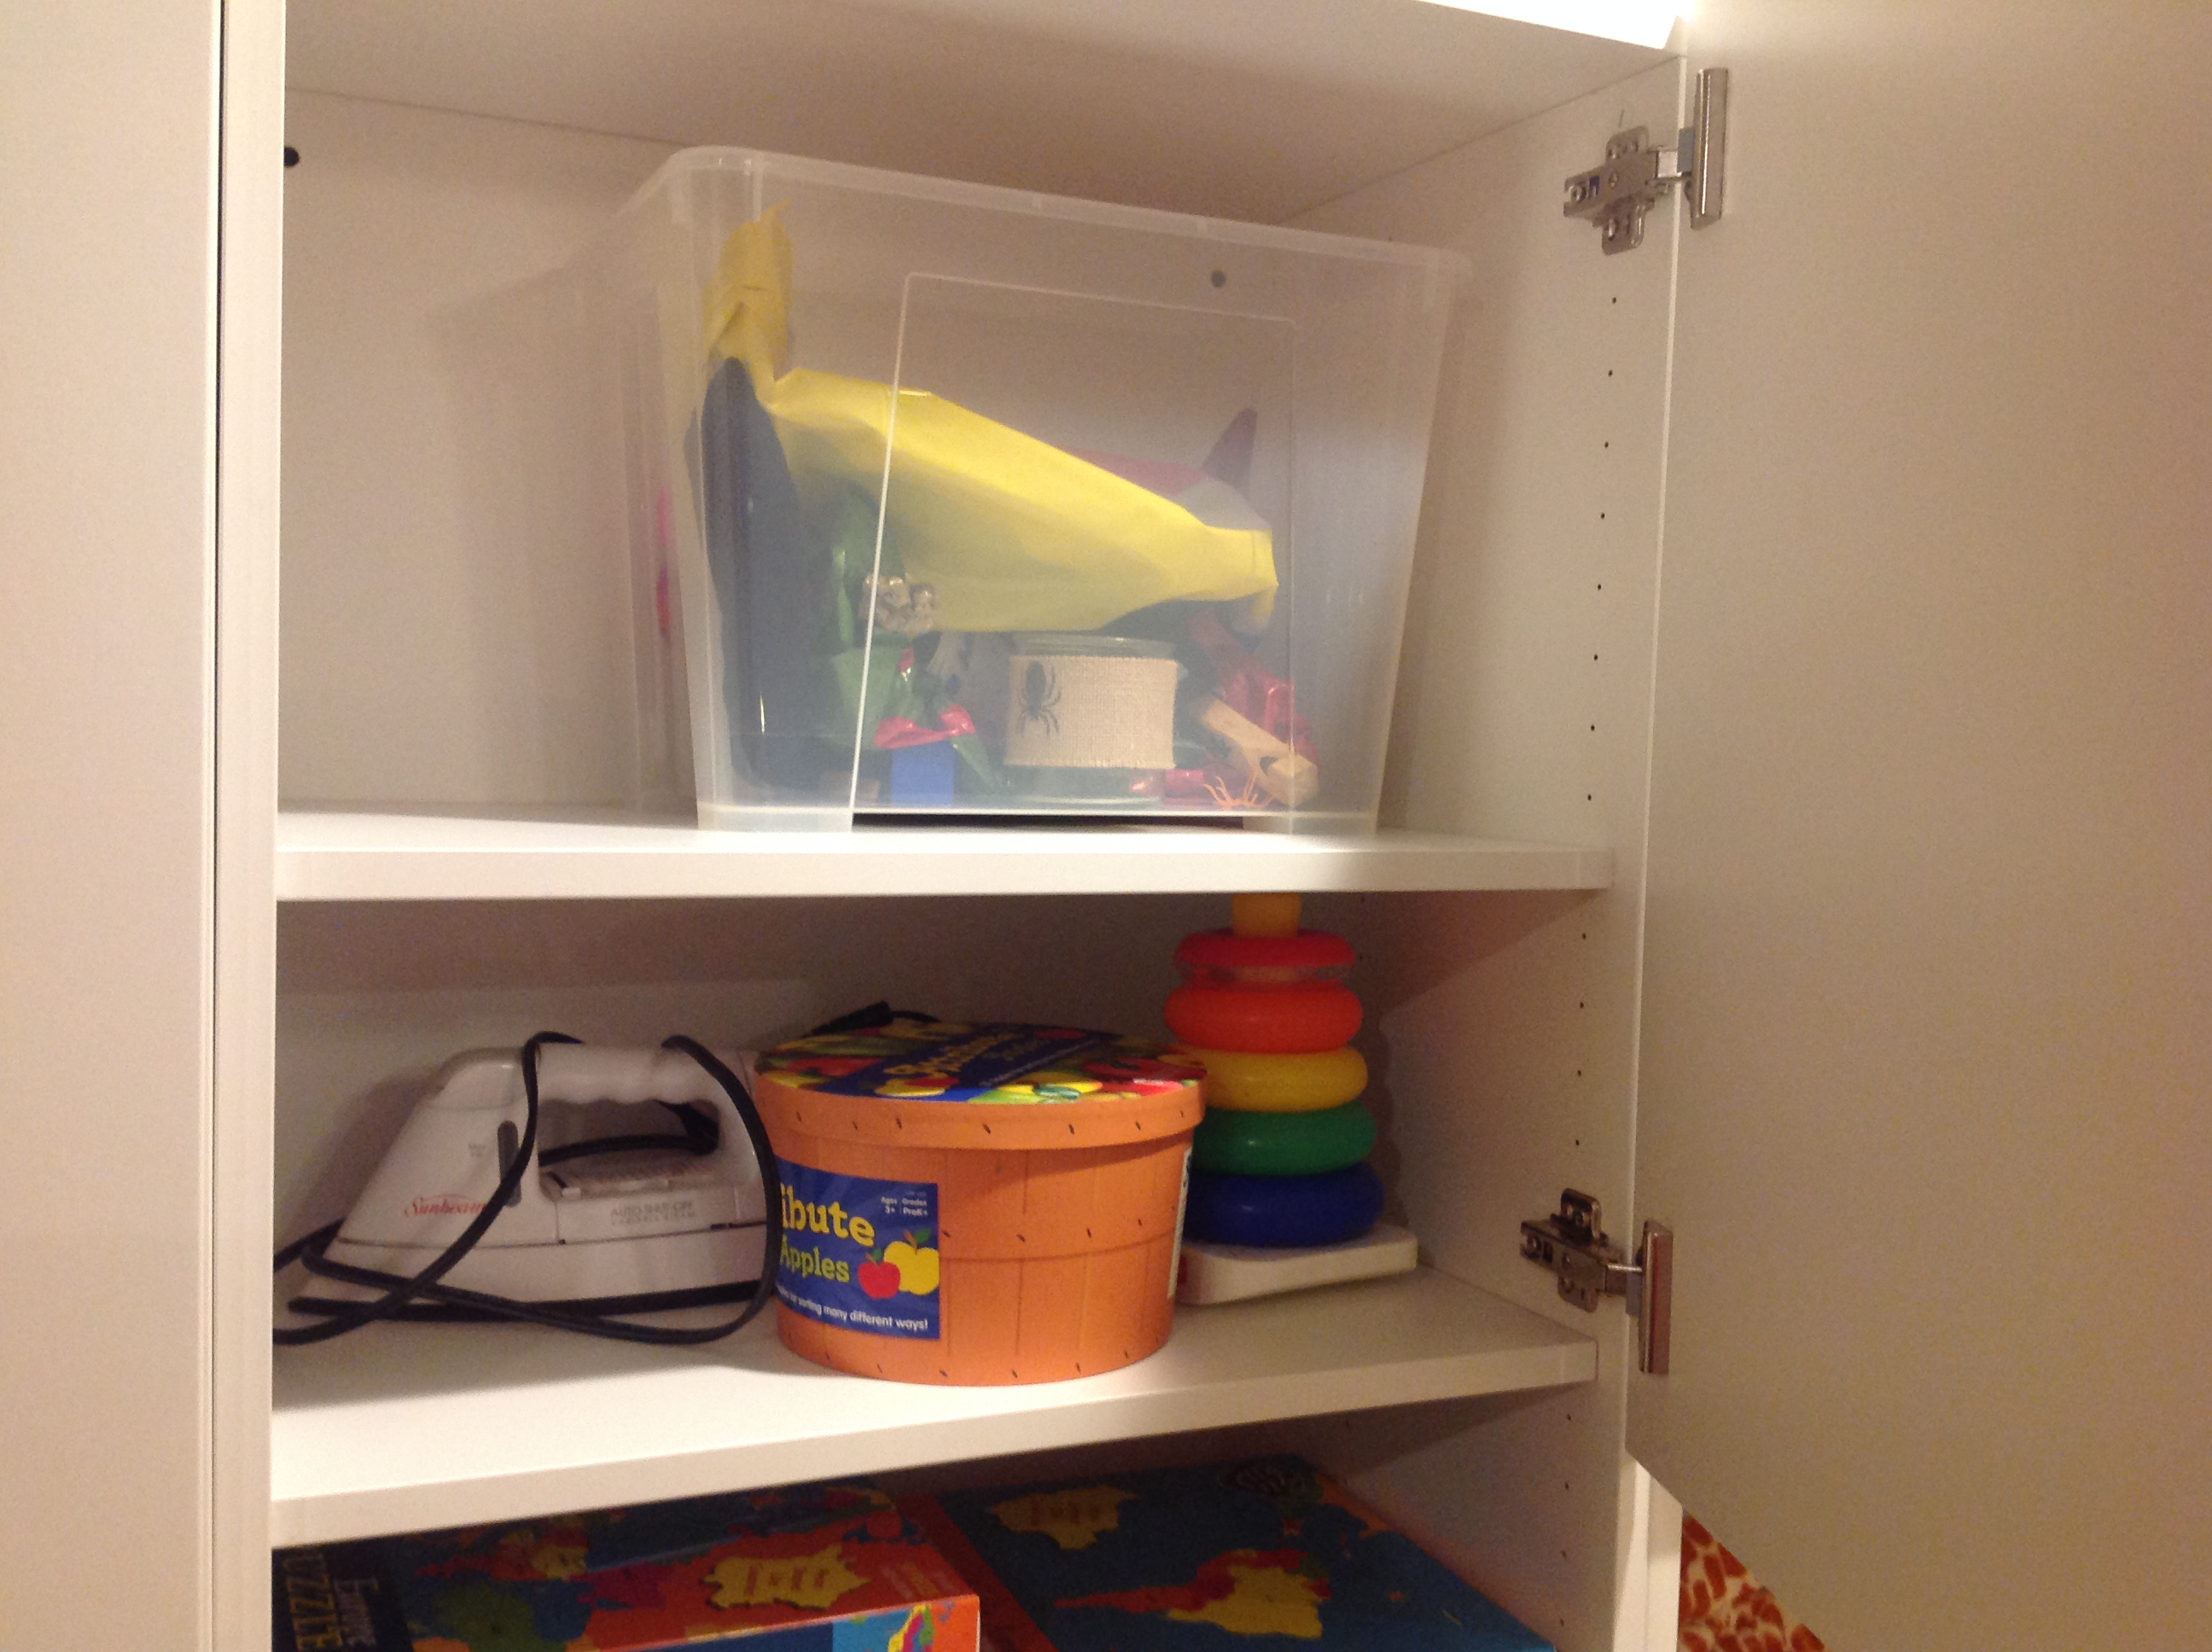
Absolutely, something like an iron is ideal to put up on this top row of shelves. I also have lesson manuals and such.
The original idea was to have many bins: two of the above pictured bin per door. However, I found that 2 bins don’t fit where there are doors as you cannot close the door. They overhang by about 1/4″. I had thought I had dimensioned these right, but, well, I was off by that little bit. I was disappointed in Ikea. They sell themselves as making things modular, but that we couldn’t get the bins in and close doors was a disappointment. Minor complaint, really.
I also found that bins only really work for small toys. But, for those toys, they do work well. I am working now on grouping such toys together. I will probably use separate bins for dress up items, tool/building toys, and little figurines/props to put on plays or play make believe with. The bottom line is like toys need to be near like toys. This is where the Konmari system shines, in that it should be easy to know where things are, if grouped logically. If I need, say, a Cinderella figurine from that dress up kit, I should know exactly what bin to go get it in, at least, even if I have to dig for it.
I am also working on grouping all other like items together. I plan on putting all wooden puzzles together, stacked on top of each other, when they are rotated out. It is true that in Konmari, she says nothing should stack on each other, being put under stress from the items on top of it. But, I think wooden toys and even regular boxes will hold up to stacking. Where the toys get rotated out are subject mostly to saving space, not to having them on free, open, relaxed display so distinct to Konmari. The toys meant for playing with are that way, but not the ones stored.
As far as stuffed animals, I saw an idea on Pinterest where you can mount bungee cords in a corner of a room and put them behind the cords. I love it. I hope to do it soon.
One of the best things about this toy shelf system is that it does swallow almost all of our toys, including the ones being rotated out. There are some toys too big to fit in our toy shelf, dimension wise, such as a very large, wooden map, and that’s OK. But otherwise all clutter has been picked up off of our toy room floor. This alone makes the whole thing worth it. It is very zen to not have little toys or whatnot spread all over the floor–not because the room isn’t clean, but because the toys don’t have a proper, permanent spot. When you walk into our toy room, you see each piece of furniture as it is. There’s a toy shelf, a book shelf, a couch, and some other pieces. Each stands on its own, in a dignified way. “Dignified” is exactly how I would describe all of this. I am still working on the rest of the toy room–I want a reading corner and some other things–but this toy shelf is the work horse.
When I was designing the Besta system, I never felt like my design was pretty enough. I saw other designs on Pinterest and wanted to copy them so bad. But their design wasn’t compatible with the functionality I needed. I just went with function. I am glad I did. Ultimately, these Besta cabinets look pretty sharp. The end result was pretty. I think any result that fits YOUR home and your needs will look attractive. I tried for symmetry where possible. If I could put a row of shelves all at the same height, I did. I tried to be symmetrical around the vertical axis. But I did not stick to this strictly. Little quirks are fun and add character. As far as doors, I found they ranged in price greatly from $5-$55. For as many doors as we had, I went with the $5-$10 ones.
Again!
This works so well for my children. I find it makes a huge difference that the toy room is kept decluttered. My children are far more likely to want to spend time in the toy room when the floor is clear. They certainly love being in there when I rotate some new toys in. I notice that “new” toys are kind of like Christmas morning to them.
My daughter, at not even 2 years old, spontaneously sometimes just starts singing the clean up song, puts her toys away, *and* finds a spot on the shelf for them. Both children both very clearly get it. I love, love, love that they have a sense of order all around them. It shows them how clean up can be easy, and desirable, to maintain. I hope this is not just a skill to them, but forms part of their character. And all of the work is on the design of the toy shelf, not me badgering them to be organized. (Ok, it takes a little bit of badgering sometimes.)
I hope to have inspired. 🙂 You may also like Cutting Clean Up Down to Size. Follow me on facebook, pinterest and twitter, and please don’t forget to check out my book series!