I have been doing lessons with my kids. Doing such hands-on lessons is proven to help a child build a better “brain architecture.” I try for #OneLessonADay, which you can find on facebook at The Observant Mom. My main goal is to teach definitions of words, in a hands-on and exact way. I have started designing the lessons by topic. These are the ones I did for the topic of properties of material.
Hard versus Soft
Hard – resistant to scratching of compressing (“squishing”). Soft – compresses easily.
Press on your forehead. It’s hard. Press on your cheek. It’s soft. We did this at dinner once. We also pressed a plate and bread for hardness or softness. Test your carpet, hard wood floor or tile, and glass window for hardness or softness.
We extended it later by dropping pennies on hard floors versus the soft couch to see if they were loud or quiet. It is easy to gather objects and sort them into Hard and Soft categories.
Rigid versus Flexible
I did this while doing laundry. Try to bend the top part of the laundry basket. It’s rigid. Try bending a sock. It’s flexible. My son just took off, grabbing many things, to see which is which.
Opaque versus Transparent
Opaque – does not let light through. Transparent – lets light through.
Take a plastic liner of some kind, like to put photos in and a dark colored paper. Put a favorite toy behind each, doing one at a time. Shine a flashlight to see if you can see the toy. Or, take a plastic bin and a cardboard box. Put an item in each. Shine the flashlight from the outside to see what you can see.
Note: “Opaque” can be “shiny or dull.”
Shiny vs Dull
Shiny – reflects light. Dull – does not.
Grab a flashlight and present something very shiny and very dull and explain it. Some of our cabinets were glossy and others were not. It was easy to see. We then went through our house with a flashlight deciding if things were shiny or dull. Giving a kid a flashlight is always an easy hands-on way to do something.
You can polish almost anything to show how it goes from dull to shiny. We put pennies in a vinegar and salt solution. It’s a great hands-on way to teach shiny versus dull. I like to point out that it’s important to protect our skin from certain chemicals as they have a clear effect on objects and can sting our eyes.
Magnetic vs Non magnetic
Put many objects in a bin. Use a magnet to sort magnetic and not magnetic.

Waterproof versus Absorbent
Waterproof – Does not allow water to pass through or absorb. Absorbent – Absorbs liquid.
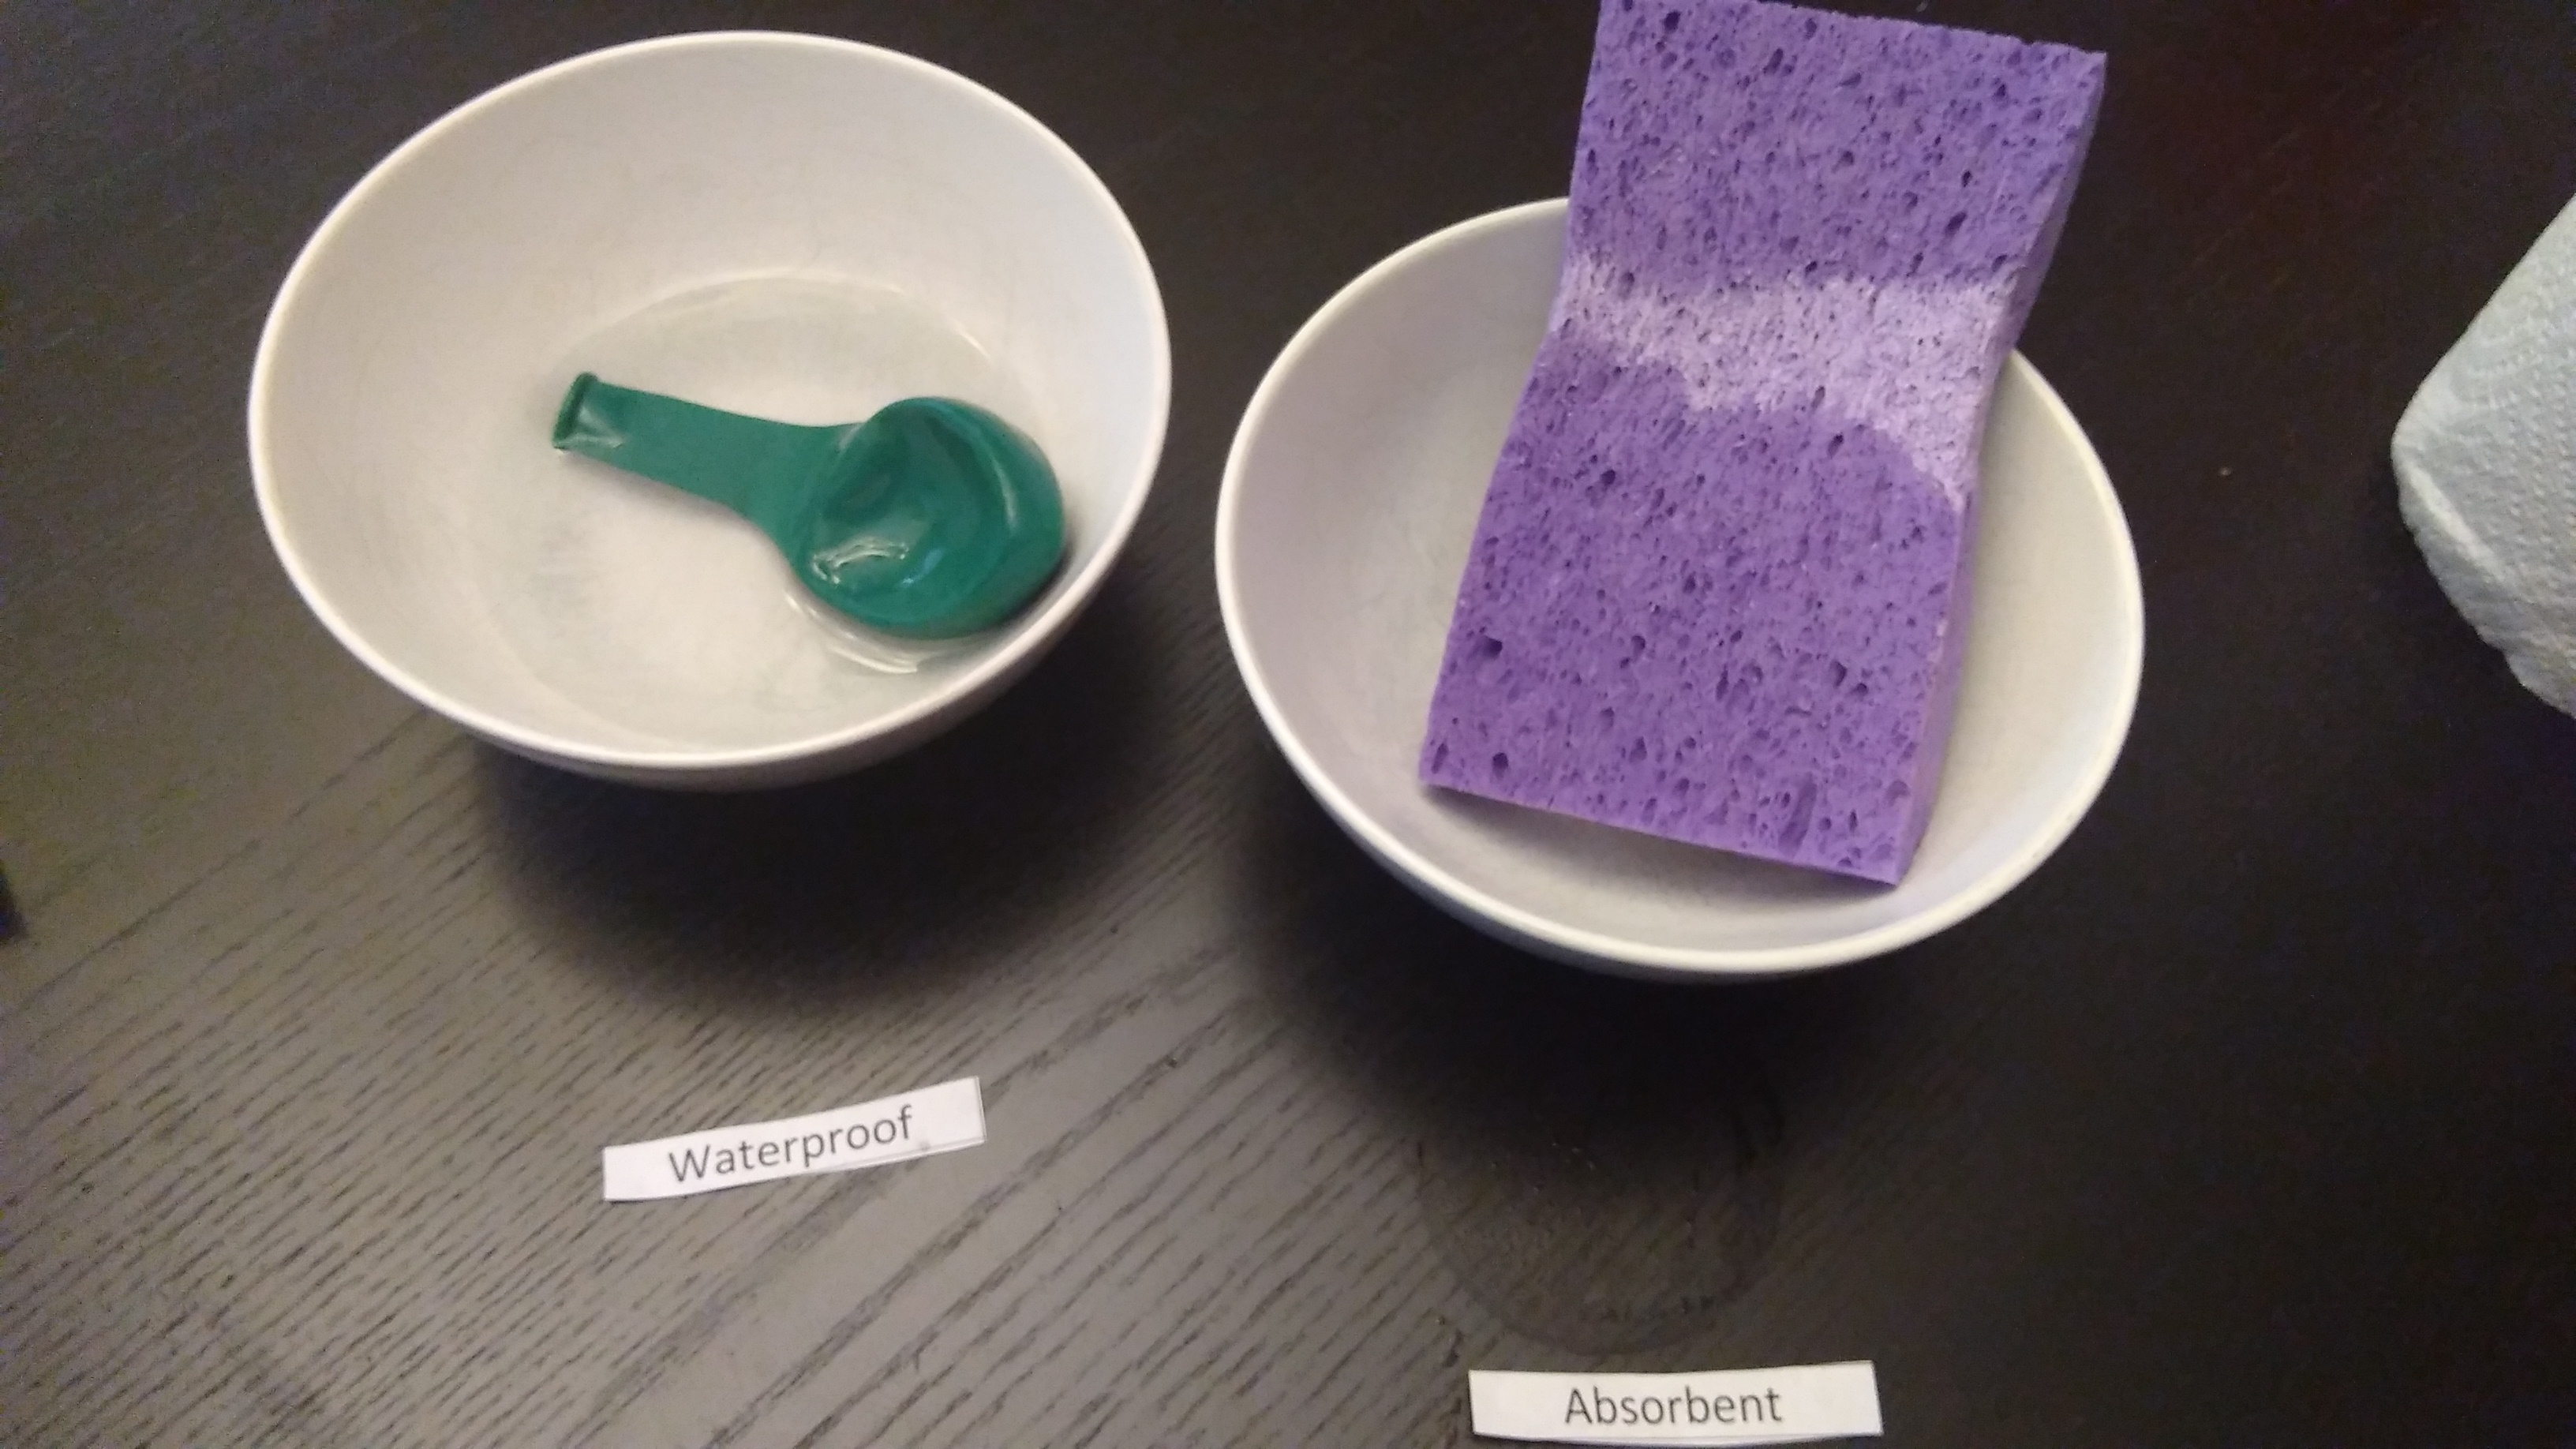
The sponge absorbed the water; the balloon did not. A balloon filled with water did not allow water through; the sponge did. My son agreed the sopping wet sponge would not make a good rain jacket and the balloon would not clean the floor well. I talked to him about the pores in the sponge and how it “wicks” up the liquid.
You can have a pot of water ready with objects and sort them into waterproof and absorbent.
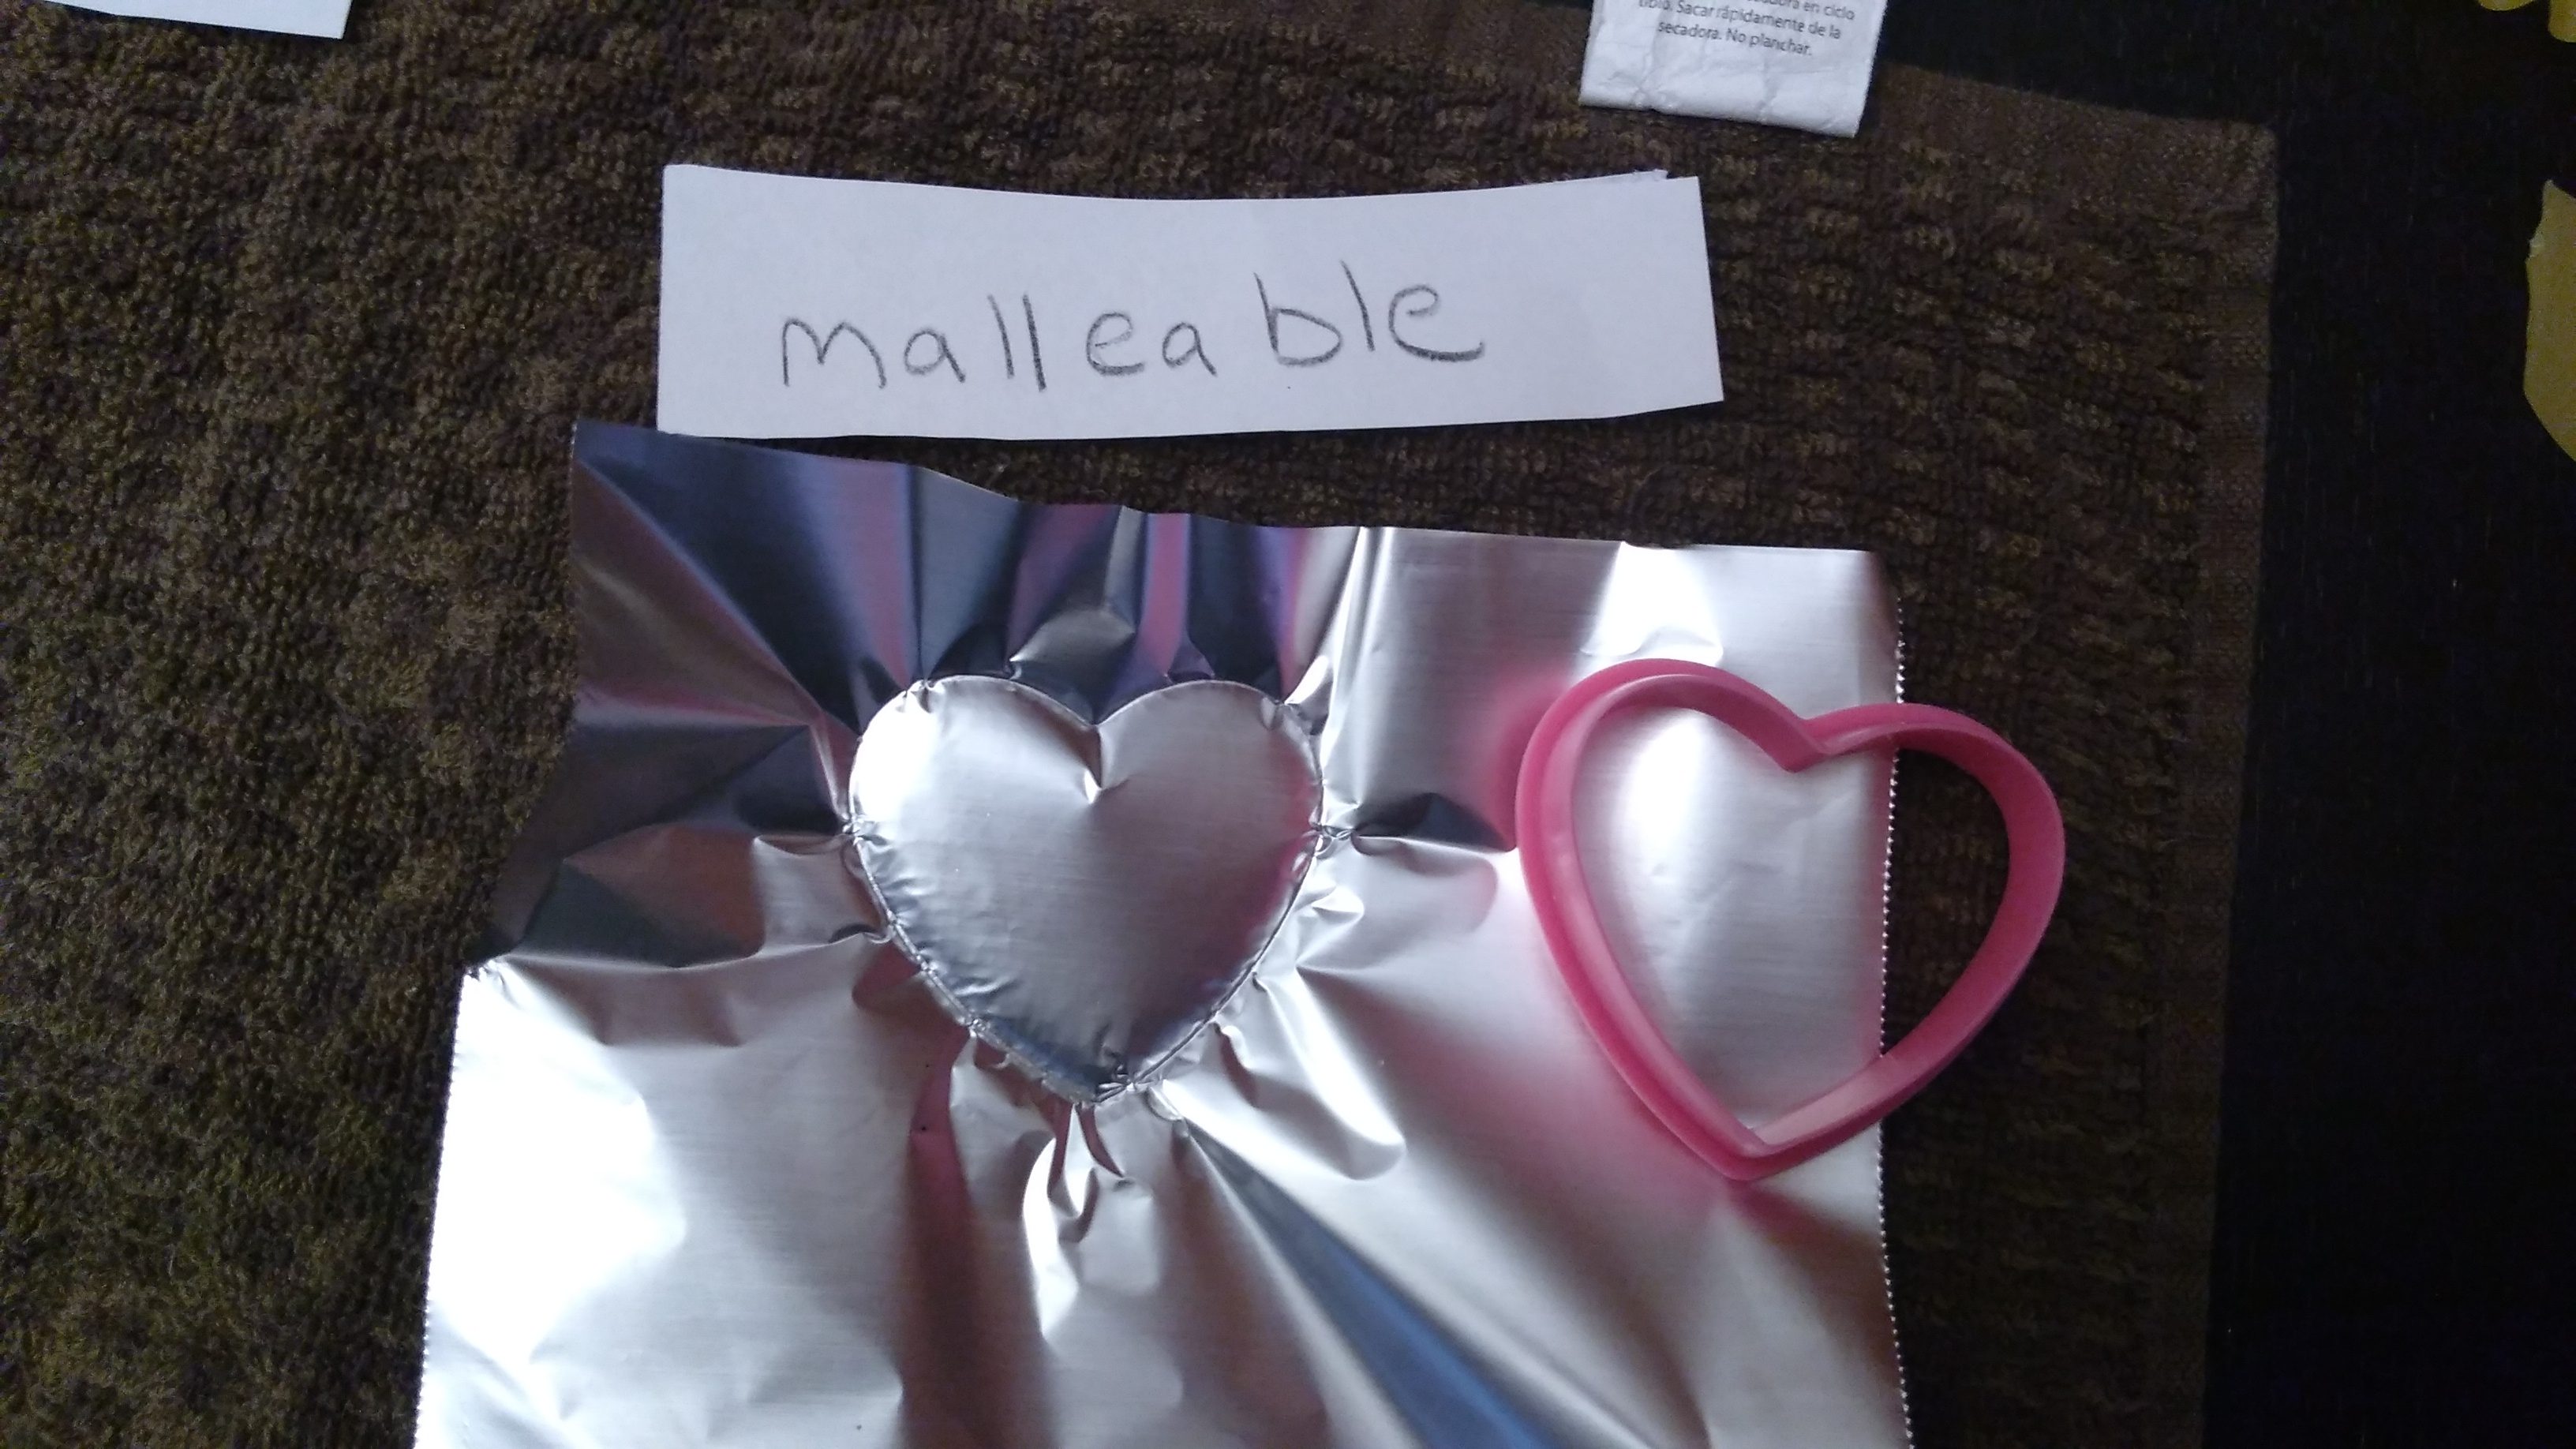
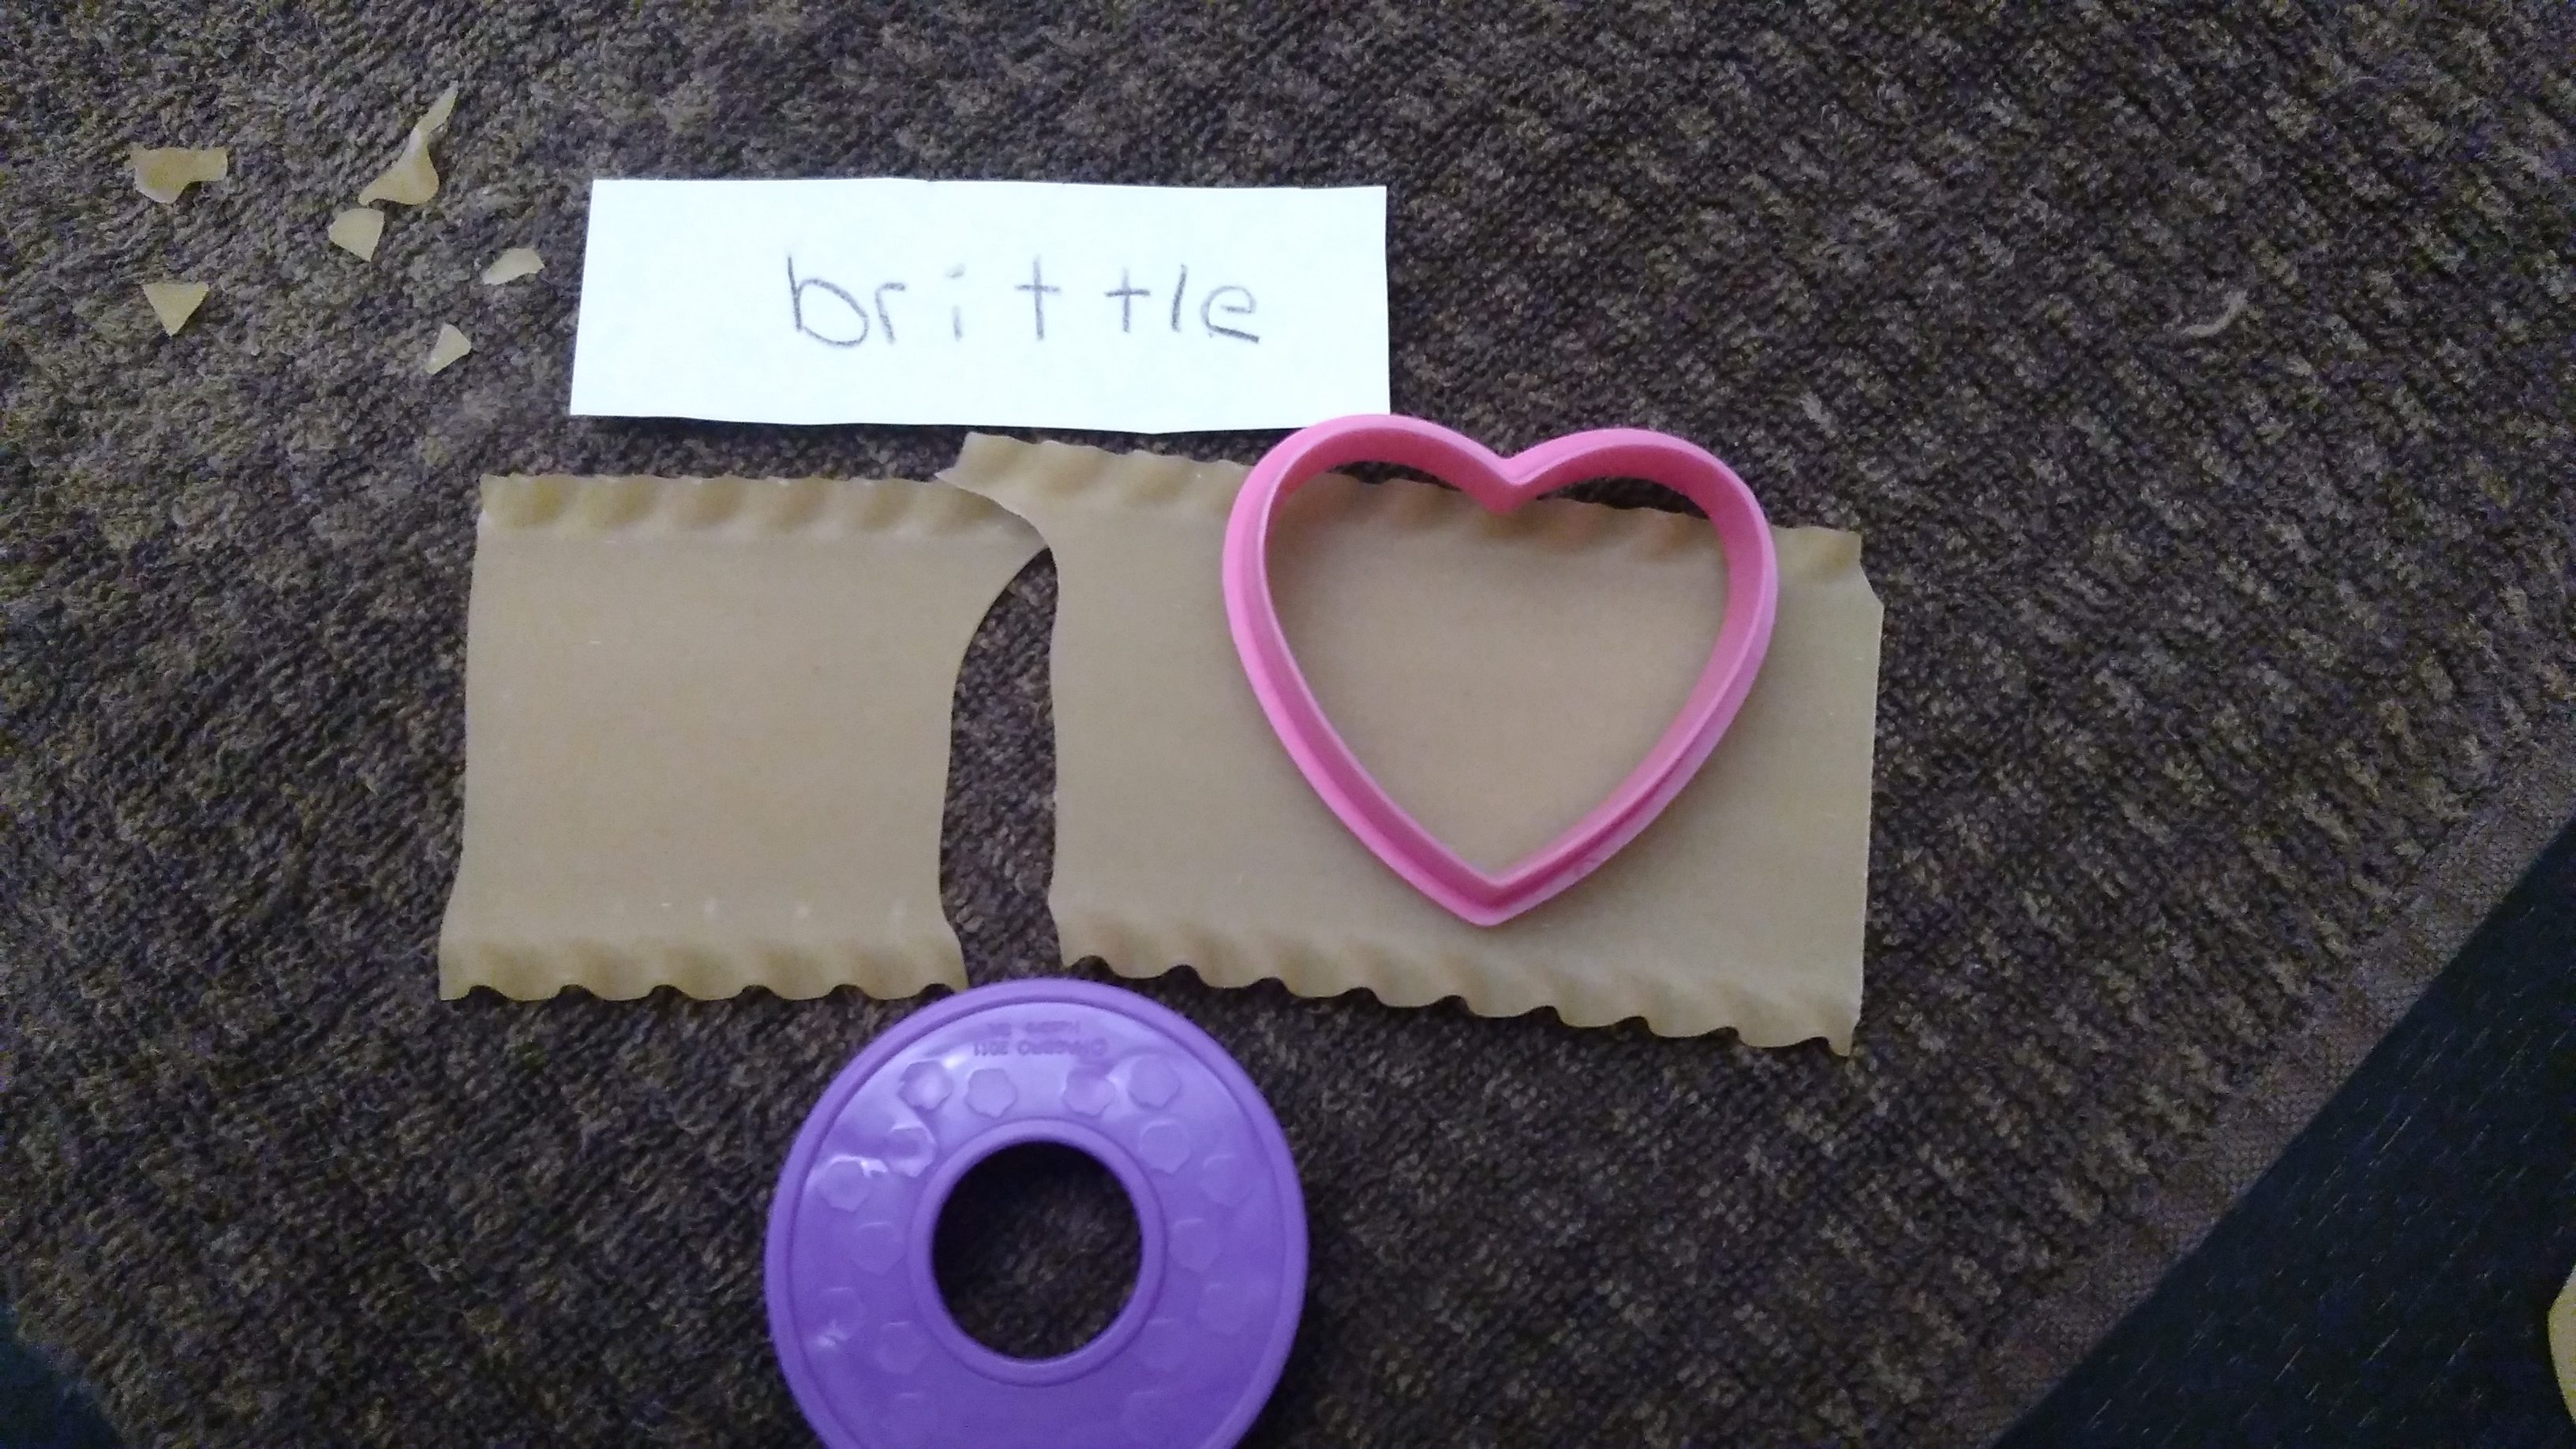
Malleable versus Brittle
See my blog post here. We used aluminum foil and lasagna noodles to see which one we could stamp images onto.
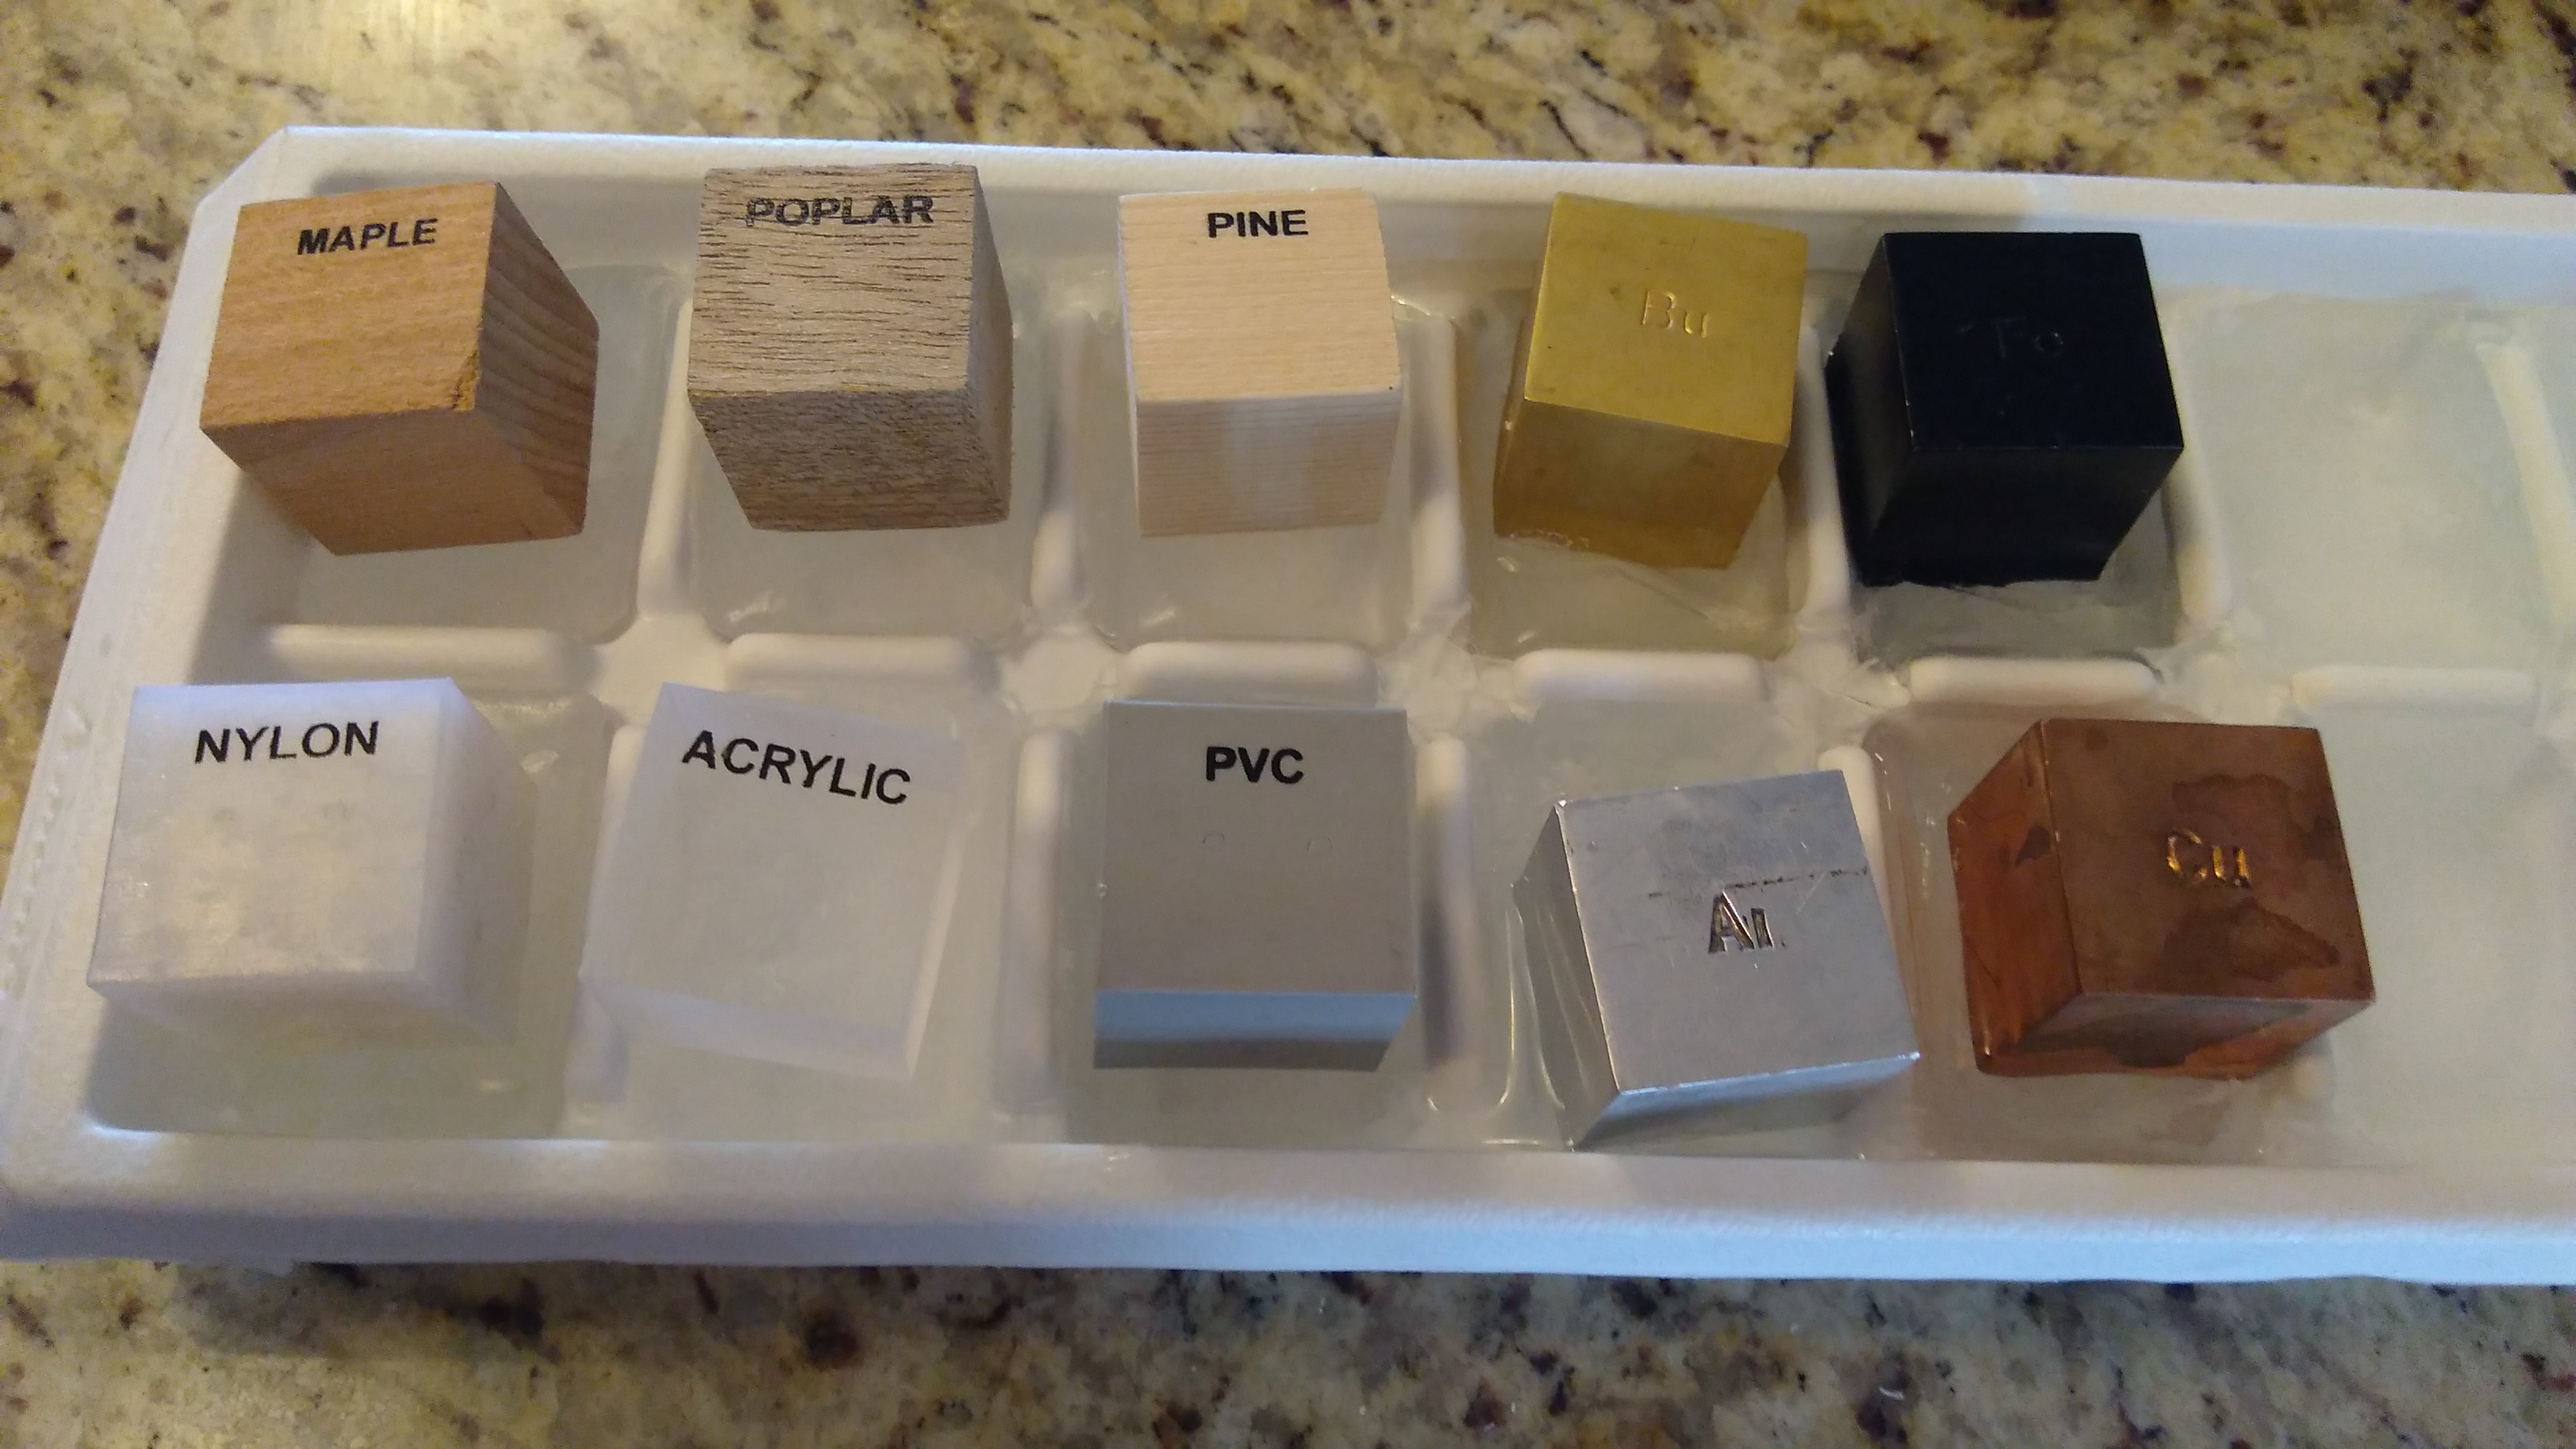
Conducts versus Insulates
This was one of our favorites. I used an ice cube tray and put density blocks on it, to see which one turns cold. You could also put coins and other materials on it. Metal will conduct the cold easily.
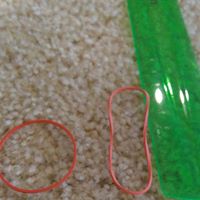
Elasticity vs Plasticity
Elastic – able to resume its normal shape spontaneously after contraction. Plasticity – quality of being easily shaped or molded.
Use a rubber band and stretch it. It “boings” back. Take a plastic bag and deform it. It stays deformed. The plastic bag, is, well, plastic.
I gathered objects into a bin and we sorted them based on if they boing back or not.
I also did a fun lesson where we kept extending a rubber band further and further, one inch at a time, as compared to a ruler. After a while, it stops going back to its normal shape. Further still, it breaks. This is actually a difficult concept for a preschooler, I think. However, it was fun. It was fun to strum the rubber bands like a guitar too.
In Part II, I’ll discuss how I gathered items of rubber, plastic, wood, metal, silicone, and glass, and we did activities with them. I hope you enjoy this! Please share!
2 thoughts on “Properties of Material Lessons for Preschoolers Part I”