You might already have these materials. If not, they are easily got on your next grocery trip. This is a lesson to teach even a 4 year old “malleable” versus “brittle.” It’s a lesson however that even a much older child could benefit from.
I have a coming post about what I have found are decent principles for presenting these lessons to children. They are, as an overview:
- Always present opposites, e.g., Hot versus Cold. Present three in gradation if possible, e.g., Hot, Warm, Cold.
- Demonstrate the lesson first, with as few words as possible, and do not ask the child questions.
- Get the child involved in a hands-on way as soon as possible.
- Present the word after the hands-on experimentation.
- If possible, have a second different but similar lesson, to be given the next day.
I see these lessons as a gift to my child. I am more concerned he learns this one lesson correctly and in a way that is fun than 10 or 100 in one day. This is part of why I do #OneLessonADay, which you can find on my facebook page.
Malleable versus Brittle
I took two towels and laid them down. On one, I put a sheet of aluminum foil. On the other, I put a lasagna noodle.
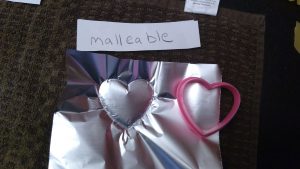
We then used Play Doh stamps to imprint shapes onto the aluminum foil. The foil makes and holds the shape, and doing this is fun and open ended in and of itself. Hands on!
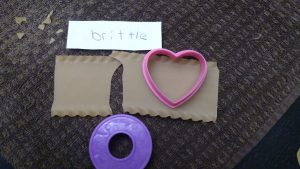
We then tried it with a lasagna noodles. They don’t imprint the stamp and just–oh no!–break. Add a hammer to make this really fun.
The aluminum foil is “malleable.” The lasagna noodles are “brittle.”
We will also trace the images on coins to tracing paper to highlight how metal can have an image stamped onto it. In the future, if interested, we’ll watch a documentary on processes involving metal.
Be sure to pin this and to like The Observant Mom on facebook.


One thought on “Malleable versus Brittle”