For my kids, I’ve been doing hands-on activities, revolving around one topic, until we’ve exhausted the topic (at their level). I have my own methods for teaching a young child concepts. My basic teaching fundamentals are:
- Always present opposites; and a continuum if possible
- Get the child involved in a hands-on way
- Give a clear, almost wordless demonstration at first
- Do not ask any questions of the child for an entire day after the lesson is given
I am very, very excited to put together the one on pressure!
Low versus High Pressure
1. Push on Your Cheeks
The simplest thing you can do, and you can do it right this second, is have your children push their cheeks out by filling their mouth up with air. The air is putting PRESSURE on the inside of their cheek. Now suck them in like your mouth is a fish. The outside air is putting more pressure on them and caving them inwards.
Also take the opportunity to point out that your cheeks were clearly filled up with something, even though you can’t see it. Air is not nothing!
2. Pressure Fight
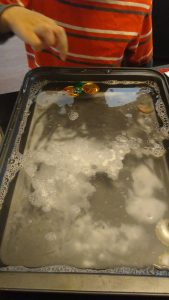
I wanted to start off with something that showed that high pressure would push things more forcefully than low pressure. I saw an opportunity when we were playing with some water. I put some floating plastic coins in. I gave my preschooler a water gun and let him push them around. I tried blowing on them with a straw. We had a “fight” to see who could move it around more.
3. Boat Water Pressure Fight
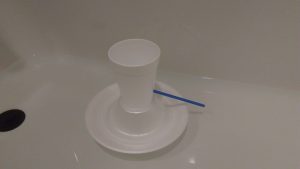
Another idea of low versus high pressure is to make a “boat” out of a Styrofoam plate, bowl, cup, and a straw like below (use a hot glue gun). You can put, say, two straws on one side and one on the other; or perhaps a jumbo straw on one side and a smaller straw on the other. Watch as the two sides “fight.” The side with more pressure will win. Let your kids feel the pressure coming out of the straws.
This lesson was a huge hit. We did many configurations of where to place the straws and we also used bendy straws to make it spin. This will come in again on our lessons on energy.
4. Balloon Rocket
And here is one more involving a “balloon rocket.” It involves a simple balloon, straw, and tape. This was super fun. I admit I would occasionally blow up the balloon just to watch it lift. The kids again can feel the concentrated pressure coming back out of the straw. They can really learn that this is what propels the balloon upwards.
Air pressing on us all around us
Air over Water Lessons
5. Milk Jug with Holes and a Balloon
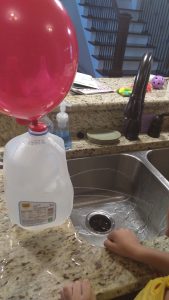
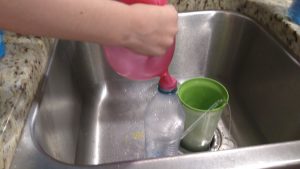
I wanted to show how air pressure can affect anything. I LOVE this lesson. I put 3 holes in a milk jug and filled it up with water, such that the water flows out of the holes. In theory, the water stream at the bottom should have the highest pressure, as the water at the bottom has the most pressure on it, from the water above it. Our holes weren’t same sized so that didn’t happen. No matter for us, really. My kids loved it.
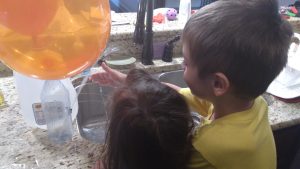
Then I put a balloon on top and the water came out HARDER. My 5 year old and 2 year old loved it. They could feel the water pressure.
I liked the milk jug one especially because the balloon stayed inflated for a long time over it.
My kids really enjoyed feeling the water spray out of the milk jug (and water bottle with straw below). They also squeezed the balloon to push more water out.
When I was blowing up the balloon, my kids wanted to feel the air on their skin when I let it out of the balloon. So, sure, it’s all a bit gross. But, it got the point about pressure across, in a way they can feel.
6. Water Bottle with a Straw and a Balloon
This is another way to do this, with a water bottle and straw inserted into it. I found this on Youtube. I liked this one especially, because after the water is emptied, after sputtering for a bit, air still comes out of the straw. Your child can put their hand by the straw and feel the air pressure.
7. Squirt Water up a Straw
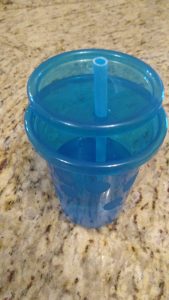
I wrapped up this idea of air pressing down on everything with a lesson using my kids’ cups. I put water in the cup, put the straw in first, then closed the lid. Water squirts out of the straw because of the air pressure pushing down on the liquid. My kids have seen this one in everyday life, routinely…
Air Flow
Forward Motion to Lift Objects
8. Run with a Ruler and a Paper
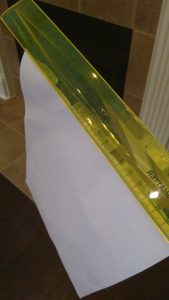
I wanted to show how air flow can affect objects, and in “weird” ways (and it’s because of pressure). The first thing I did was to tape paper to a ruler. I then used a hair dryer to blow below the paper and above. Blowing above also lifts the paper. It has to do with air pressure. The science of this is actually unsettled and too much for preschoolers, so I didn’t worry about it for this time.
I also asked my son to see if he could hold on to the ruler and run with it such as to keep the paper lifted. He of course readily accepted the challenge. I explained that similarly, an airplane needs to move forward to stay lifted.
Upward Motion to Lift Objects
9. Hovering Balls and Balloons with a Blow Dryer
I got the hair dryer out and I showed my kids how it could be put on low or high. I let them feel it on their skin. Truthfully, if this lesson of low versus high pressure from the hair dryer, and how it feels is all they get out of this, I am happy with that. When others talk about pressure in the future, I want them to recall in their mind how one feels over the other.
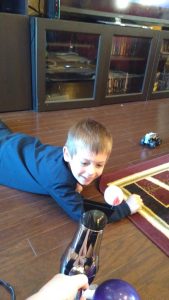
We made things hover with the hair dryer. Here is a ping pong ball hovering. Yes, these lessons were a delight!
We also did balloons. The balloons were the same except one was blown up a little bit, one medium, and one a lot. The one filled up the most, thus the largest, actually floated the highest–again, it has something to do with the pressure pressing on the balloon from the air flow! (And, again, I understand the science of this is not totally settled, though I could be wrong, but it may be too much for a preschooler anyway.) We had all 3 balloons hovering at once. Sorry, it was too hard to get a picture of this. That lesson was a definite winner though!
How Shape Affects the Air Around Moving Objects
10. Flying with Different Shapes Paper
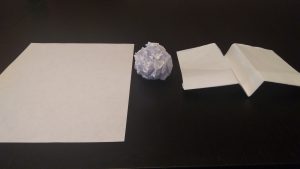
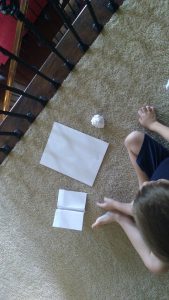
So, this may be favorite lesson to date. I took 3 identical pieces of paper. One I left unfolded, another I crumpled up, and another I turned into a paper airplane.
We threw each. The unfolded one flaps to the ground. The crumpled one goes straight and drops. The paper airplane glides! It helps the child better “see” air resistance and flow.
I really like how this highlights how the shape matters. If you just started with paper airplanes, you might think that that is just what paper does.
My son became completely obsessed with this, in a good way. He wanted to make more and more airplanes. We have the book The Kids’ Paper Airplane Book by Ken Burns so that was easy to do. We adjusted elevators and rudders to see how flight path was affected. He told me, “The shape matters!” This was a huge success.
11. Parachutes
To show how air resistance slows down an object, I made two parachutes, one small and one big. The big one catches more air and makes it go more slow. I made them out of Ziploc bags. They worked, sort of. I may look into making better parachutes than this to better illustrate the idea.
Other Ideas
Siphon
So, truthfully, I don’t know exactly how a siphon works other than it has to do with air pressure. (When I look into the issue, however, I am positive that the above activities will help me follow along with the explanation better.)
Nonetheless a siphon is FUN! Here is how we did it with plastic tubing. You can also take the top glass down and watch it fill back up. Adding food coloring is fun. Add blue to one, yellow the other, and watch as green is made and transferred back.
Air Pressure from the Wind
To again better feel the idea of pressure, drawing attention to the wind is helpful. There are many things you can do, like fly a kite. I put yarn on a plastic bag and anchor it with a chair. We watch as it whips around. Other wind activities include making a weather vane or anemometer. I will do more of this when we get to our lessons on energy, and how we can harness the wind to move objects. I find the idea that objects (especially ones that you care about, e.g., favorite small toys) can be lifted by the wind (or maybe even yourself!) is just pure fun.
Hands-on Activities
After giving lessons like this, I always like to end with hands-on activities. For this, the spontaneous one my child did where he flew airplanes for days was enough. I hope to make sail boats in the summer. Again, these lessons on pressure are running right into lessons on energy, and it’s hard to separate the two. No matter! I love that the science lessons so easily lend themselves to the engineering lessons, i.e. the knowledge lends itself to how to use the knowledge.
Other Ideas
I haven’t got one yet, but a recommendation to me was to get a pressure gauge for a child to use.
I bought the book The Boy Who Harnessed the wind, about a boy whose village was destroyed and he figured out how to build a windmill to bring power to his village. It’s a chapter book. I look forward to reading it with my children.
Be sure to follow me for other simple science ideas on The Observant Mom
