This is an elementary science curriculum on animals! I made these because I was disgruntled with how most science taught today is detached from reality. These are hands-on lessons meant to immerse a child and awaken them to the beauty of the animal kingdom. See more about my elementary science program here.
For your convenience I include affiliate links below.
Definitions
After some experimentation with my children, I realized definitions need to come first. Imagine you are about to buy a new high tech camera but you don’t know the first thing about cameras. Now imagine someone gives you an even-paced, clear explanation of each feature, with charts, pictures, and everything. When you go to browse cameras, you will be able to “see” those features much more easily. It won’t be a mess of numbers and letters. It will make sense.
That is what these definition lessons are like. They raise the child’s awareness to certain aspects of animals such that recognize them better as they study individual animals later. I knew this approach was powerful after I gave a lesson about vertebrates and invertebrates and my daughter, at 3 years, 9 months, started asking about everything and if they had a backbone or not. She once asked, “Does pepperoni have a backbone?” This approach allows them to ask their own questions and to learn more as they have their own experiences.
Don’t feel like you can’t move on to studying animals until you’ve done all of these first. But I do put them first as an ideal order of progression.
1. Vertebrates vs Invertebrates
A vertebrate is an animal with a backbone. An invertebrate is any other animal who does not. An invertebrate may have no bones or some bones but just not a backbone. The first major classification of animals begins with if they have a backbone or not.
Point out your child’s backbone to them. Point out that it helps them be both strong and bendy. Have them bend their spine. They’ll love this. It may lead to inquiry about how the spine is made up of vertebrates, allowing it to be strong and bendy.
Picture are great for this lesson. The pictures really need to show the skeleton of the animal. There is no way to know for instance that a snake has a spine without seeing its skeletal diagram (or cutting one open). My children loved looking at the skeletons (they are skeletons after all) of animals.
A skeletal diagram of the major types is shown below: mammals, amphibians, fish, reptiles and birds. Print this here, Skeletal Diagrams of Animals
Vertebrates
It’s possible you will come across these bones in everyday life, such as if you catch or eat a fish. You might point out the skeletal structure.
Invertebrates
And then of invertebrates. These are available in the printout linked above.


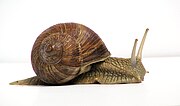


The only intent of this lesson is to show the difference in backbone/no backbone. To see if they retained the information, ask them if the animals you just taught them about are vertebrate or invertebrate. Do not ask them about any other animal they have not been exposed to in this way yet. As you do individual animals studies later, this will be something to take note of.
Extra resources
- Here is a poster you can buy, although it does not show the skeletons
- Invertebrates (Dr. Binocs)
- Invertebrate Animals (Happy Learning English)
2. Exoskeleton, Endoskeletons, no Skeleton
Simply explaining that some animals have their skeleton on the outside of their body is enough for this lesson. To explain that the skeleton is on the outside, I love this lesson in which you put cardboard on a stuffed animal to give it an “exoskeleton.”
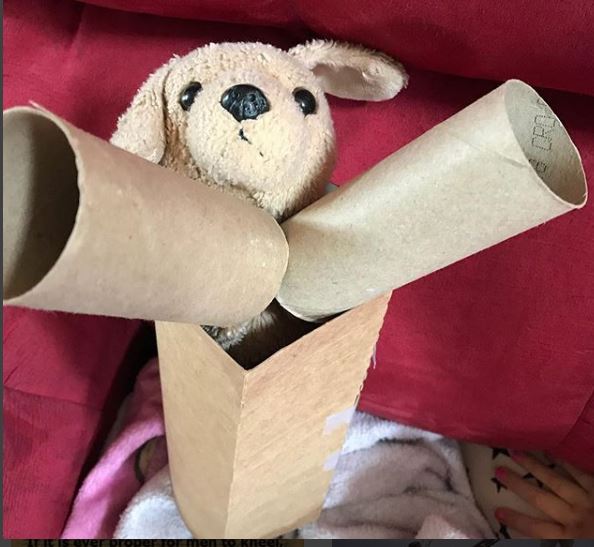
I was in perpetual confusion for a while over the relationship between something having an exoskeleton and vertebrate/invertebrate status. For instance, a turtle has a shell but it also has a vertebrate. I learned that a turtle technically does not have an exoskeleton. Its shell is more like the horns of a goat. To my understanding, and the way I explain it, is that if an animal is a “vertebrate,” it cannot then have an exoskeleton. More classic exoskeletons are crabs and lobsters. Nearly all insects have an exoskeleton, even a spider though it’s not hard. (This information seems hotly contested and debated. Drop me a note if you think it is wrong or I need to add more information. I am happy however to raise awareness, even if the awareness is that “scientists don’t always agree.”)
Children 5 and older are probably already familiar with the fact that they have bones on the inside. Simply emphasize that and say we have an endoskeleton. Point out that without a skeleton, we would be very limp. Point out that some animals have no skeleton at all, such as octopus and jellyfish. As you study more animals later, this will be something for them to take further note of. (Does a coral reef have a skeleton? Does an ant? Truthfully, I don’t know all of the answers! And that’s OK!)
Videos on Exoskeletons:
- Watching an animal emerge from their exoskeleton can be illuminating such as this cicada.
- What’s an Exoskeleton? (Science Up with Singing Zoologist)
- Why do some animals have their skeletons on the outside? (nguyen manh)
3. Teeth of Carnivores and Herbivores
Teeth designed to chew plants have a broad surface area to grind plants, called molars. Teeth designed to eat meat are jagged in the back (no need to grind plants) and look like fangs in the front. Printing something like this probably will come in handy:
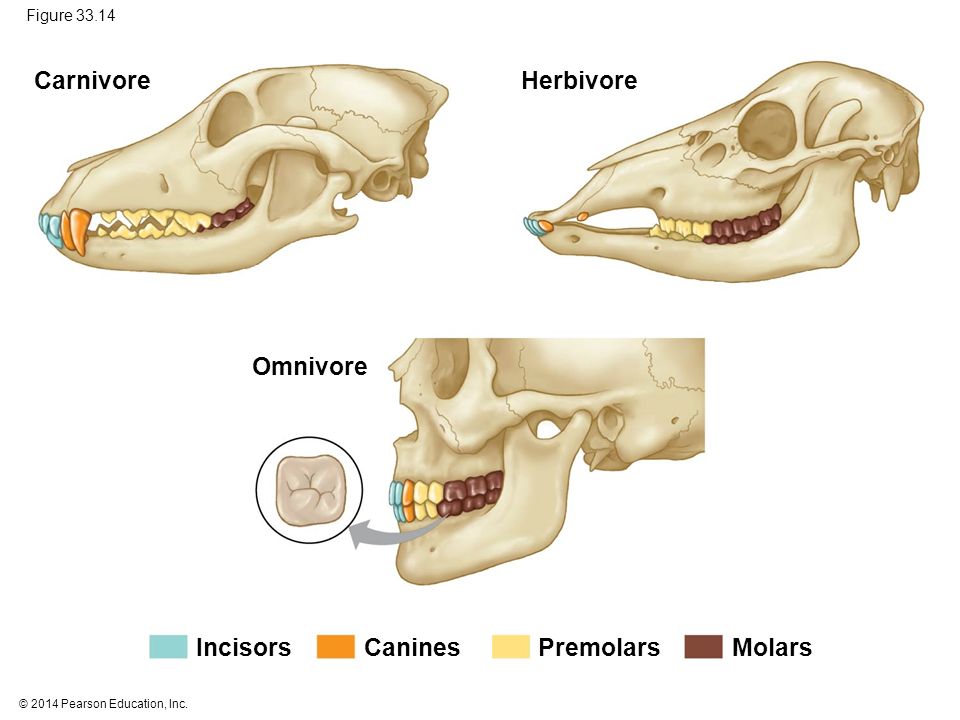
It’s so wonderful that you can buy models of animals skulls inexpensively. I bought a TOOB toy of animal skulls. I got several for about $11. Show the teeth of the herbivore versus carnivore to the child with the tiny plastic models. If you don’t want to buy this, you can print off pictures.
(Affiliate Link)
To make more of an impression, take a skull with fangs and ask the child if they would be scared if they saw those teeth. I bring emotions into my teaching. The answer is a resounding yes. Ask if they would be scared of a cow. The answer is likely no. This makes a much deeper impression on what the teeth of a predator are like.
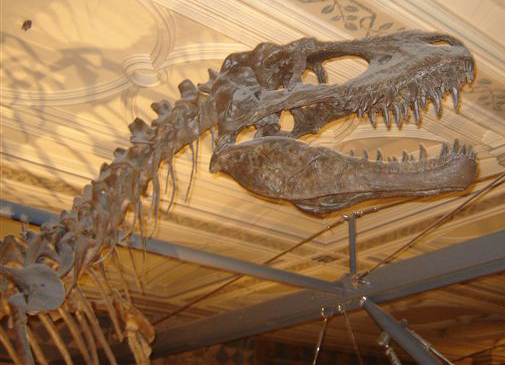
Scary!!!
4. Ratio of Carnivores to Herbivores
With figurines, you might set up that one predator needs to eat 10 herbivores and 1 herbivore needs to eat 10 plants. The natural ratio in nature therefore is 1:10:100 carnivore:herbivore:plants. If you don’t have figurines, you could use different types of pasta to represent each type of animals.
You might point out when reading books that there is typically only one wolf for a flock of sheep. If you see it in nature, you might see that one snake in a pond eats around 10 frogs.
Point out that plants get energy from the sun. All energy when traced back goes to the sun.
Hands-down, the best way to teach about how animals adapt is with plays. This is more than “just” fun, it’s beginning science. You can start this as young as 3 years old if not younger. My 3 year olds love to pretend we were leopards about to POUNCE or hummingbirds HUMMING. It’s a great activity that can involve younger and older children. Bring the emotions into it! Pretend you are animals doing what you have to to survive. There are so many books about this. You probably have some hand-me-downs that you can use. Any kind of book like “The World’s Most Dangerous … ” or anything weird and whacky. Here are some of the plays we have put on:
- Pretended we were a shy octopus who threw ink (a blanket) around us when threatened
- Waited in hiding to pounce on passer bys like a predatory cat
- Hopped like a frog
- Put blanket after blanket on top of us to feel the pressure that a deep sea creature would feel
- Hummmmmed like a Hummingbird
In addition, ask simple questions like “Can a dolphin live on land?” Or “Who has an easier time to get across a river, a squirrel or a duck?” Opportunities arise all the time.
We also had a GeoPuzzle of animals which showed where they lived. We did this puzzle and talked about how the animals were adapted to live in the regions of the world that they lived in.
We love SciShow Kids to explore many types of animals and how they survive.
Some time after doing lessons like this, when my son was 6, he made up stories about how his invented animals could adapt to their environment. He invented a fish once whose nose could split atoms and would survive the collapse of the universe. When your child is actively using information to solve problems, you know the information stuck! What great engineering skills that are budding!
6. Not All Animals Have Eyes
The best way to do this is to read a book about how animals have adapted. Animals in a cave often don’t have eyes. Worms also don’t have eyes. Here are two book recommendations:
- Animals with No Eyes: Cave Adaptation (Capstone Press)
- It’s a Good Thing There are Earth Worms (Jodie Shepherd)
7. Warm-Blooded Animals versus Ectotherms
Simply explain that some animals can maintain their temperature despite their surroundings by generating their own heat. Birds and mammal do this.
Ectotherms do not need to do this or have other means of heating themselves and generate very little heat for their bodies. You might point out that reptiles like to bask in the sun.
8. Genetics
A very fun activity is to print out picture of your whole family and then point out a few things. First, each child looks different: there is genetic variety. Then point out in a very straight forward way that a certain child got a certain trait from one of their parents. They inherited it. I like to point out that they did not inherit other things, like a knowledge base or skill set.
Explain that a human and another animal could not reproduce. You might ask questions like, “Could we have a baby with a dog?” They will likely think this is hilarious. That we can mate makes humans part of the same species.
9. Live Young or Eggs
A really fantastic way to explain this is to talk about which animals “take care” of their young. A child is probably already familiar with this. They might melt at the idea of a mommy dog taking care of her puppies. Say that mommy doggies and human mommies take care of their young and we are both mammals. I like to ask the question, “Does a sunflower take care of the seeds it drops?” The answer of course is no. Explain that that is why a sunflower produces many seeds, because they cannot take care of them and most will get eaten. Opportunities are certain to arise, in books if not in nature itself, to explain that reptiles and birds lay eggs.
10. Life Cycles
Show a life cycle of two different animals for comparison and contrast. I diagrammed them on a white board. A frog lays an egg, which turns into a tadpole, which turns into a frog, repeat. Then do one of humans. Explain the idea of the next “generation.” Show many sets of humans creating many more sets of humans.
Individual Animal Study
With these definitions learned, as they study individual animals, they will have more to look for. Animals can be studied with books or live.
11. Study Animals with Books
Take heart that many answers can be found simply by reading books! My favorite books for this are ones from National Geographic Kids and Scholastic.
Ask simple questions about each animal after learning about them to best classify where the animal stands in relation to other animals. Having learned the above and if the book gives the information, ask questions like:
- Does it have eyes?
- Does it have a backbone?
- Does it have an exoskeleton?
- Is it a carnivore, herbivore, or omnivore?
- Does it produce live young or eggs?
Children as young as 3 love this and children around aged 5 especially love this. My 6 year old still loves it.
This is a recommended list of animals to study to cover a wide variety of animals. I’ll add links to recommended books as I find them. You can likely easily find a book at your library. In the juvenile section, there is an “Animal” section and it’s grouped by type of animal.
- Bird
- Alligator
- Frog
- Any fish
- Any mammal
- Snail or Octopus
- Crab or lobster
- Insect
- Spider
- Worm
- Coral
12. Study Animals in Nature
How much more exciting is learning about animals when you have come face to face with some, maybe in your own backyard. These are ideas to increase awareness of animals.
- Put up a bird feeder and get a local field guide on birds to identify the birds that come.
- Hunt for frogs at night with flashlights during their mating season. Try to find their eggs later
- Set up an earthworm farm by filling up a bin with dirt, leaving them vegetables to eat and leaving it mostly covered but open just a crack
- Visit an aquarium
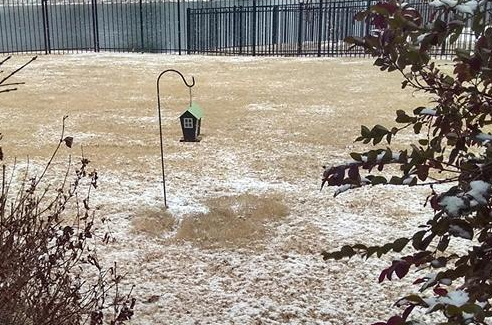
This was our bird feeder. A metal stake in the ground, which we got from a hardware store, and the birdhouse. It’s served us well for years.
Categorization of Animal Kingdom
Now that they have an understanding of some animal characteristics, children can sort them and ponder them. I strongly favor sorting activities to do this, using cards with animal pictures on them. What better way to learn about animals than to be immersed in (often if not always beautiful) animals!
I went out of my way to put together animal cards that included a wide variety of animals using beautiful pictures and which would be ideal for sorting activities for a comprehensive understanding of the animal kingdom. They are all public domain or properly accredited so I could share them.
Please print, use, and share! Please respect my hard work by not posting these elsewhere. Direct people here so they can find these. The category headings are already also included in the printouts. I recommend printing them on card stock. Click the link or the picture, which shows a sampling of the cards.
Animals Plants and Technology Objects Cards
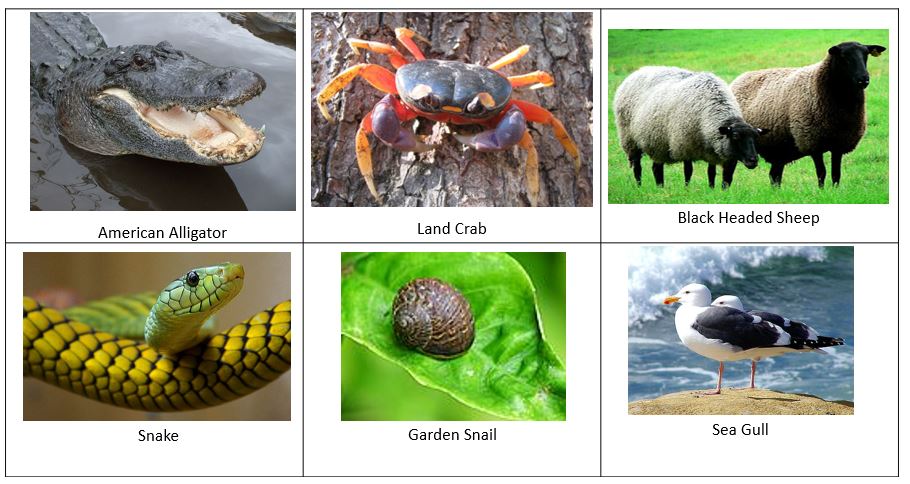
Here is a a list of sorting activities in rough order to be executed. I include one on technology here only because you have it available and it’s so easy to do. I did not include more sorting activities on plants because that might be simply too much for one lesson.
Pre-Sorting: But first, Let Them Play!
At first, children will likely be excited by all of these pictures. Let them play at first! My son for instance became very interested in the idea of what animals had eyes or not. He zoomed right in on the worm. He wasn’t sure. We got the book out which told us. I loved that he was getting practice on researching it. I was thrilled that he wanted to see it. He similarly asked to see a picture of a butterfly, asking to zoom in real close to see if it had eyes.
From here, go on to formal sorting:
1. Living versus Non Living
In the printout, there are animals, plants, natural resources, and technological achievements. Sort them into living or not living.
2. Natural versus Man-Made
You’re already here so you may as well do this lesson. Of the non-living items, sort them into natural and man-made. Explain directly that sand is natural but a sand castle (both included) is man-made. It is made up of sand but humans arranged it for a purpose.
3. Animals versus Plants
Now focus on the living items. Of the living items, which ones are animals or plants. I ask the question, “Can plants walk?” Explain also that living items all need energy otherwise they die.
4. Vertebrates versus Invertebrates
Now focus on just the animals. Of the animals, which ones have a vertebrate and which ones don’t. Have the printout from the previous lesson about this available to help. I found this was hard for my 6 year old. It is better to ask which ones have a backbone and which won’t done and then put them into the vertebrate/invertebrate columns. The purpose is to do a hands-on activity to help them remember the information, not to test them or see how good their memory is.
This creates such a pretty sorting. It is also the first classification of the animal kingdom. Tell them that most animals in the world are invertebrates. I did a google search while doing the sorting activity and found that there are 100 trillion ants and only about 8 or 9 billion humans.

Note we ended our sorting for the day here and did the rest on the second day. I do however recommend executing all of the following on the same day.
5. Mammal, Bird, Amphibian, Reptile, Fish
Among vertebrates, the next classification is into class.
I was stunned that my 6 year old sorted them as shown below. I laid it out into bird/reptile/fish/amphibian/mammal but he took the other category heads and placed them correctly. Birds have beaks, wings, and feathers. Then he made the columns such that reptiles and fish both had scales. He put the hair/fur label under mammal. He thought hard about where to put “No Legs” and finally told me, “Birds DO have legs, you just can’t see them all the time!”
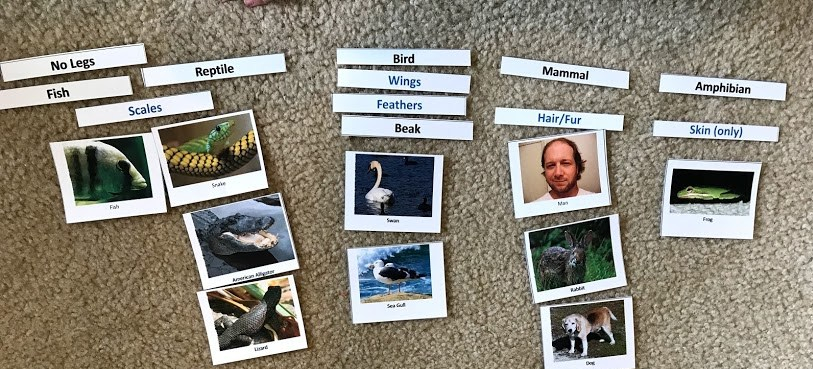
I include this story to show just how effective these sorting lessons can be. Look through the work of scientists and you will see just how important sorting is to their clarity of thought. If your child is the one doing the classification, you are rest assured they understand it! This is fertile ground for quality thinking.
Otherwise, I had planned on showing this by doing just that: asking to find the animals with hair/fur and putting them under mammal, ones with feathers under bird, and so on. Fish are easy. Reptiles are different from amphibians because amphibians have smooth skin and live partially in water or land.
6. Endoskeleton, Exoskeleton, No Skeleton
Every single animal in the vertebrate column has an endoskeleton. The invertebrates may be sorted into exoskeleton, endoskeleton, and no skeleton. From their studies, they might know that jellyfish (included) do not have a skeleton. In my research, I found out that spiders technically have an exoskeleton. For this purpose, if they get it wrong or don’t know, it’s OK. You might look it up with them.
7. Have Fun with these Classifications with Probing Questions
At this point, you have beautiful pictures laid out in a logical way that your child just spent a lot time doing a lot of thinking about. Their mind is ripe for lots of discussion! Take advantage of it! I made up questions while looking at them and they were all fun. Questions like:
- Can an alligator build a bridge?
- Can a fish and a sheep have a baby?
- Do all animals have beaks?
- Do all animals have legs?
- Would we humans do well living in the dirt?
- Can humans spin a web?
- If you squash a bug, do you feel a skeleton crunch or does it just squash?
- Would you rather be a bunny or a duck?
- Who could cross the ocean: a whale or a lion?
7. Mouth or No Mouth
Make sure to do this categorization and you can do it verbally. I would be very straight forward about it. “I am going to see if every animal has a mouth.” Then go through one from each group. Every single animal has a mouth! That’s because it needs energy. Ask your child to put their hand over their mouth and feel what it would be like to not be able to eat. We’ll hit some energy lessons hard in future curriculum!
8. Don’t Leave Yet: The Classification of Animals
Again, after doing all this work, be sure to take advantage of it with what seems to be a most fun lesson for children by showing them the classification of the animal kingdom. I printed out an image I found online here. It fascinated my son. Then I also printed out a picture of human classification here. This also fascinated him. I followed along with our sorted pictures as far as I could to show how we would be classified.
Further Study
Of course you can study this much further. I found my son at 6 had much more specialized knowledge than I did and it was from watching shows like SciShow Kids and Dr. Binocs. I insisted on doing these hands-on lessons to give structure to his thinking. After this, however, for an elementary aged student, I turned the keys over to him by letting him watch videos and read books. His mind is ripe to learn. I occasionally ask questions like, “Why does that walrus have those huge tusks?” The opportunities are usually endless.
I look for further ideas for study, and I am especially interested in the child doing self-directed study. If you have ideas for this, I’d love to hear them.