An elementary level course on plants!
All Lessons:
- Water Germinates Seeds
- Leaves Make Oxygen when exposed to Sunlight
- Leaves Seek Out the Sun
- Stems Wick up Water
- Water Retention of Soil
- Make up of Soil
- Worms Fertilize Soil
- The Carbon Cycle
I am looking for feedback on these lessons to be included in Misbehavior is Growth: The Early Elementary Years. Send me a note if you liked them or what could be improved: helloamber@gmail.com.
See my full Elementary Science Program here, including the explanation of the straight-forward approach I use. Send questions, comments, or corrections to helloamber@gmail.com.
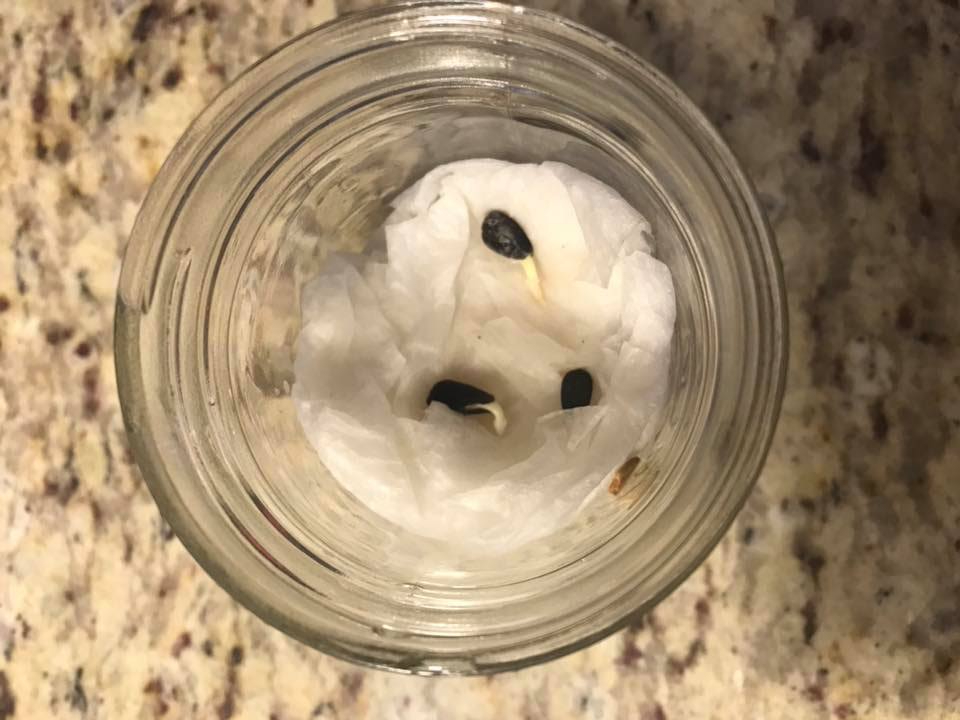
1. Water Germinates Seeds
This is one of my favorite lessons ever. Take paper towels and loosely put them at the bottom of a transparent (perhaps plastic) cup. Put water on them such that they are wet but not soaked. Nestle a seed into them. The seed will germinate! (And “germinate” is the right word.) This shows that the only thing needed to germinate a seed is water (and air, which we’ll show later).
A child is given a front row seat to the process. A natural conclusion will arise: if you want a seed to grow, make sure to water it.
What you see here are the roots:
As they grow, you’ll see the roots, stem, and leaves. You can give a lesson on all of these, even allowing your child to touch all of them.
2. Leaves Make Oxygen when exposed to Sunlight
This clearly shows how leaves need the energy from the sun. Take two leaves from trees. I like to say, “Leaves are such hard workers. They make energy for the tree. Thank you leaves for letting us see how you work.” Put both in different bins of water. You will need a rock to hold the leaf down. Put one in the sun and one in the shade. After an hour or so, the one in the sun will have more bubbles on it. They are Oxygen bubbles. You can see the one in the sun made more.
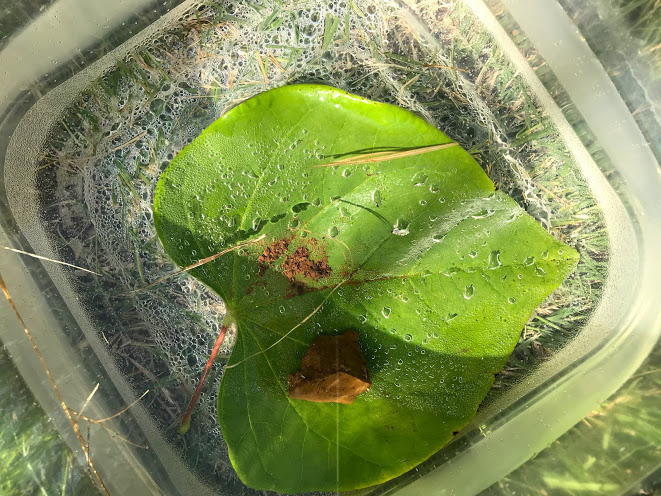
The sun acts as energy. It is like electricity to a blender. The process takes in Carbon Dioxide and water and turns it into Oxygen and food for the plant. This process is called photosynthesis.
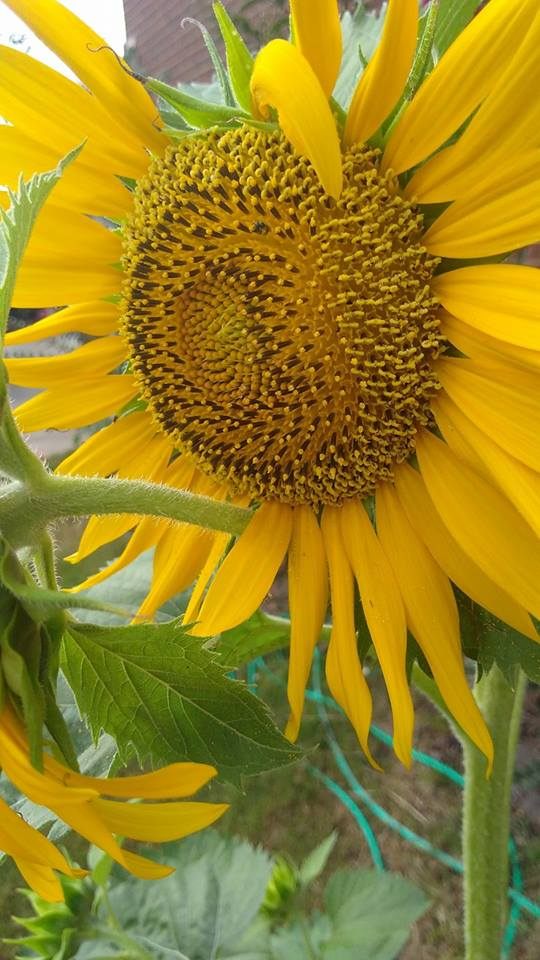
3. Leaves Seek out the Sun
For this, ideally you would grow at least 2 plants. We love to make sunflowers. Notice, after they sprout and have healthy leaves, how the leaves turn towards the sun. In the morning, they face east and at night they face west. If you have several plants, you will see them all face in the same direction. It’s almost surreal! My daughter as young as 3 understood this. “They love to be warm!” — my 3 year old.
I’ll definitely add a picture because this is really cool to see! In the meantime, here is a pretty sunflower looking towards the sun.
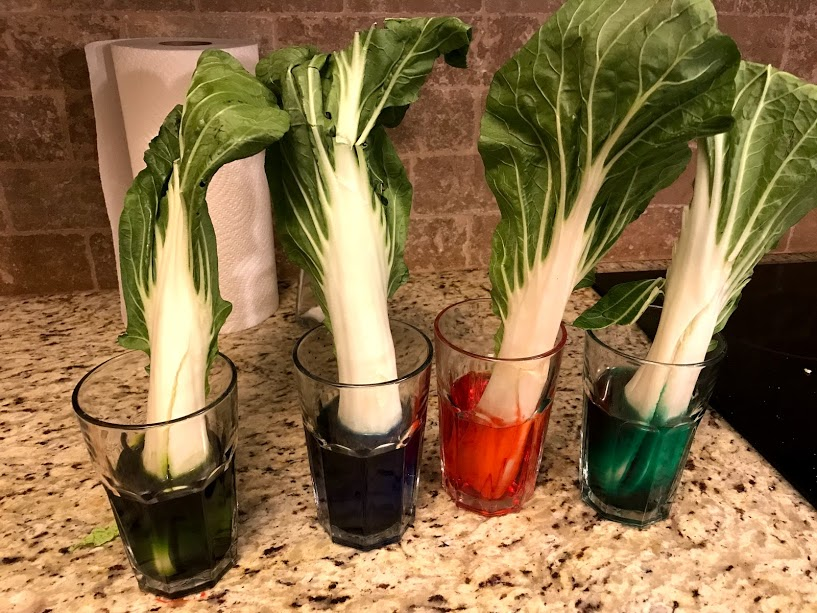
4. Stems Wick Up Water
So now they know two fundamental principles: roots primarily need water (and air) and leaves primarily need sunlight (and carbon dioxide). The stems, the third major part of a plant, are like a circulatory system.
For this lesson, you stick some type of plant in colored water and watch as the water wicks up the stem via capillary action. I am told the trick to this is to cut off the bottom portion of the stem. Don’t be shy with the food coloring, put perhaps 10-20 drops in. Our attempt with using cabbage turned out somewhat well but these improvements would likely make it better.
5. Water Retention of Soil
I love this one too. It shows that the most desire attribute of dirt is its water retention ability.
Take three clear plastic cups (so you can see what is going on). Fill one with sand, the other with dirt, the other with dirt as well. Put a seed in each. Put a reasonable amount of water in the one with sand and the second one with dirt. For the third one, overflow it with water. You might want to put something like a birthday card over the one with sand and dirt (with reasonable water) to prevent evaporation (but let a little amount open so air gets in.)
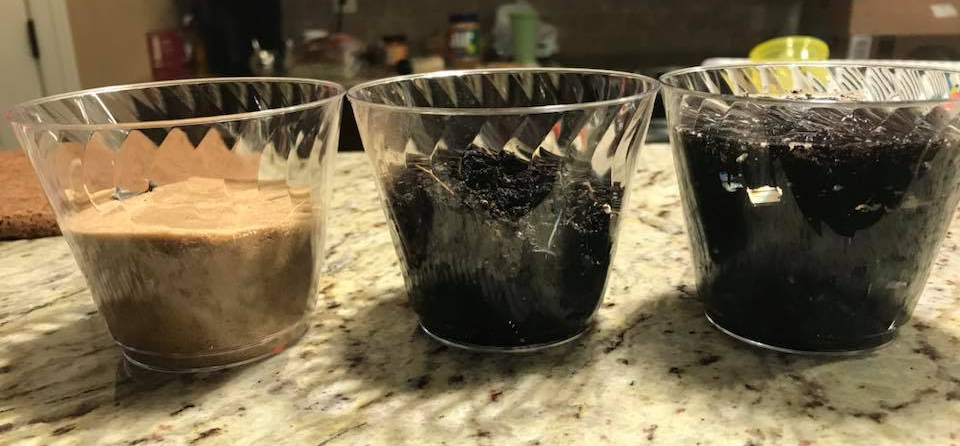
My 6-year-old son was convinced that the one saturated with water would do the best!
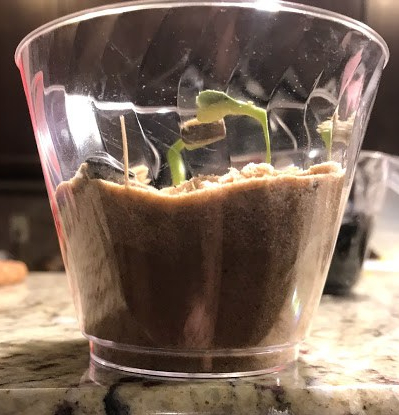
In an amount of time, the one with sand and the non-drenched dirt one will germinate. The one soaked with water will never germinate.
You may notice that the one with sand has much of the water drain to the bottom. You might be able to see the clear line in ours between where the water is and where the dry top is. This is the problem with sand: the water drains right through it. It does not hold water well.
Can you see the two layers with wetter sand at the bottom and dryer sand at the top?
The one with too much water won’t germinate at all. This is because seeds need air in addition to water. They are essentially suffocated. Put your hand over your mouth and pretend to not be able to breathe. That’s what it’s like for these seeds.
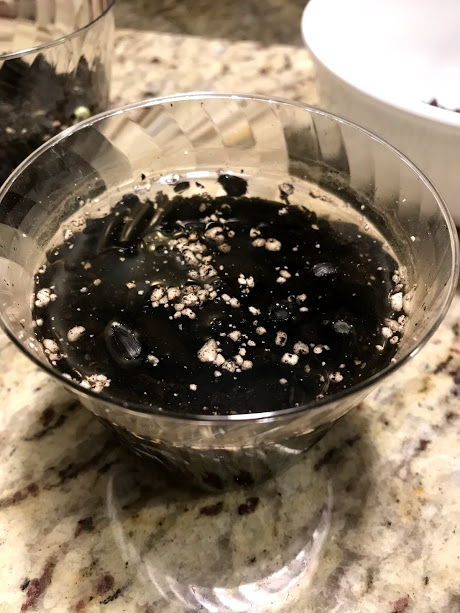
There’s no air!!!
Eventually the one in sand collapsed. The one with too much water never germinated. The one with the right amount of water continued to prosper.
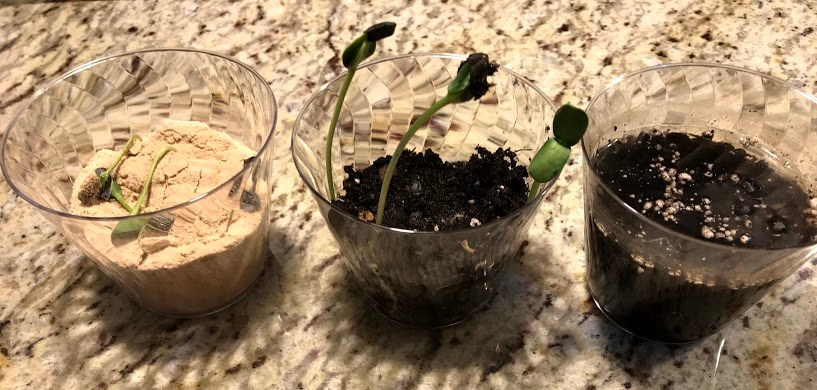
Winner!!!
My children really liked doing this. They liked keeping tabs to see which would do better. Soil needs to hold water but not too much water. The one in the middle is just right. After it got to this point, we took them outside and looked at the roots. Point out how dry the sandy one is at the top and how the one with dirt “held on” to the water.
6. Sediment Jars
This is a really fun one too. You will take dirt from your own yard, fill it halfway up in a mason jar, then fill the rest up with water. Shake it, and then in a day or two see the separated layers.
To explain what you are doing at first, you might put known sediments into the jar, shake them up, and then see the clear separated layers. You could put sand, rocks, grass, and potting soil in easily. Then do it with your own dirt, now with a better eye of what to look for. This was ours:
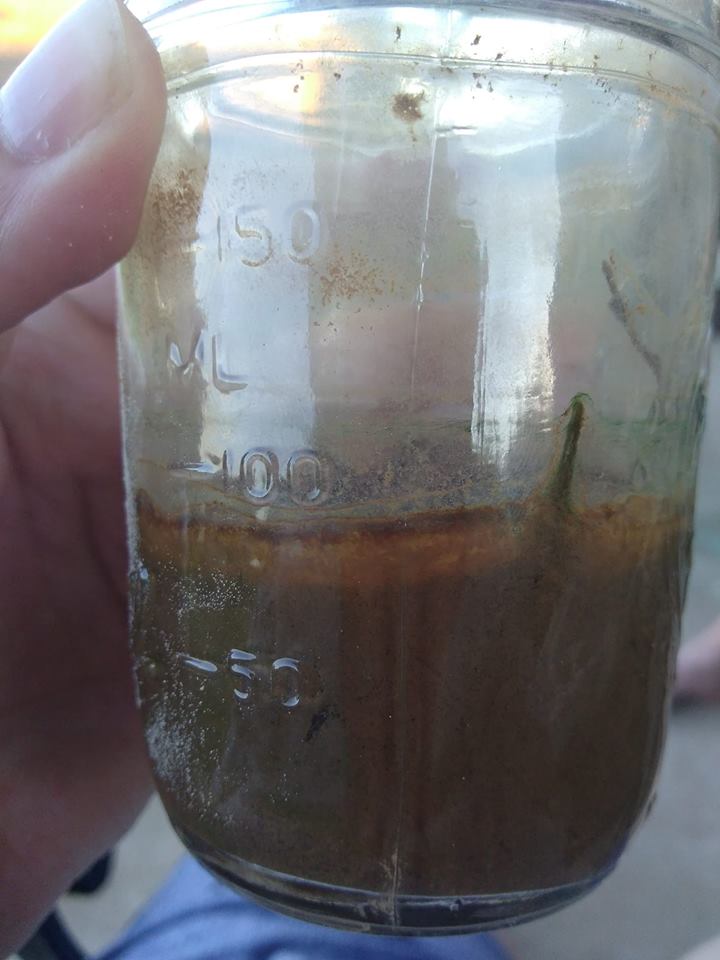
The order of layers will be rocks, sand, silt, clay, and humus (decaying matter.) I believe ours was mostly silt and clay.
7. Worms Fertilize Soil
I love the idea of this lesson, but we weren’t able to make it work. We couldn’t find any worms! For this, fill up a see through jar, perhaps an aquarium, halfway with dirt. Put some earth worms in it along with some vegetables for them to eat. Cover it mostly, leaving a crack open for air to get in. An earth worm farm! Explain that the worms are making the soil rich with nutrients for plants to grow in. I know when I was a little girl this would have given me a super fuzzy feeling inside like “aahhhhhhh, super fertile dirt.”
8. The Carbon Cycle
After all of this, I believe a child is finally ready for the Carbon cycle. Note that one of the reasons I am putting this curriculum together is to give hands-on, intellectually clear lessons before presenting something abstract like the Carbon cycle. It was one of my biggest gripes that children in elementary science class today are told words like “photosynthesis” or “the carbon cycle” and they have never grown a plant. With this curriculum, not only have they grown plants with these series of activities, we’ve isolated the plant parts and children see very clearly a plant’s need for sunlight, the resulting Oxygen, and so on.
It’s plenty easy enough to explain the Carbon cycle or find a diagram (a good search provides plenty). Animals breathe in Oxygen and let out Carbon Dioxide. Plants breathe in Carbon Dioxide and let out Oxygen. A balanced ecosystem! My 6-year-old was fascinated with a simple diagram that showed this.
Want more? Know of a lesson not included? Drop me a line, helloamber@gmail.com. See my other Elementary Science Programs.
I am looking for feedback on these lessons to be included in Misbehavior is Growth: The Early Elementary Years. Send me a note if you liked them or what could be improved: helloamber@gmail.com.
2 thoughts on “Elementary Science: Plants”